
How to replace a Delta shower cartridge is one of the higher-confidence DIY plumbing repairs — Delta’s 1700-series and MultiChoice cartridges are designed for clean installation if you follow the manufacturer’s sequence. The catch: most online guides skip the two parts that actually matter — the bonnet-nut torque spec and the cartridge pin alignment — and that’s why so many cartridge replacements leak from day one. This guide covers the full procedure end-to-end, with the spots most homeowners get wrong called out explicitly.
If the valve body itself is failing rather than just the cartridge, see what replacing a shower valve costs.
A new Delta cartridge runs $15–$50 for aftermarket/generic equivalents (Danco, FloFast) or $70–$75 for OEM Delta (the RP19804 lists around $75 at Home Depot and Lowe’s). Plumber rates for cartridge replacement run $150–$350 per hour, with a typical full job total of $200–$400. DIY savings: $300–$400 if you have an hour or two. Difficulty is moderate — straightforward sequence, but precision on the bonnet-nut torque step.
If your faucet is the original you bought as a homeowner, the part is likely free under Delta’s Limited Lifetime Warranty — call Delta customer service with your model number before paying anything. They’ll ship replacement cartridges at no charge for as long as the original consumer purchaser owns the home, which often means the only out-of-pocket cost for learning how to replace a Delta shower cartridge is shipping.
If you’re not yet sure your shower valve is actually a Delta, take 60 seconds with the brand and model identification guide first — the same identification methods apply to tub/shower valve trim. If you’re sure it’s Delta but unsure WHICH cartridge fits (RP46074 vs. RP19804 vs. RP46463), see the Delta cartridge identification guide, use the Repair Finder to identify your cartridge by valve model, take the old cartridge to the hardware store and match it visually, or check Delta’s parts finder by model number.
How to Replace a Delta Shower Cartridge: First, Confirm It’s Actually the Cartridge
The first rule of how to replace a Delta shower cartridge is: don’t, unless the cartridge is actually the problem. Before any disassembly, rule out the simpler culprits. The cartridge is the right fix when:
- The faucet drips from the spout when fully off (cartridge isn’t sealing internally)
- Hot/cold mix is uneven or hard to control (worn discs or O-rings inside the cartridge)
- The handle has gotten stiff or “gritty” feeling (mineral buildup or wear on cartridge internals)
The cartridge is NOT the right fix when:
- Water pools at the base of the faucet on the deck (that’s an O-ring failure between spout and body — different repair)
- Water shows up in the cabinet under the sink (supply-side leak; cartridge isn’t involved)
- The flow is weak but the faucet doesn’t drip (likely a clogged aerator, not a cartridge)
For the full diagnostic, see Why Is My Faucet Leaking? 6 Common Causes. Once you’ve confirmed cartridge, continue.
What You’ll Need to Replace a Delta Shower Cartridge
Knowing how to replace a Delta shower cartridge requires only a small set of tools. Most homeowners already own them all.
Tools (most homeowners already own these):
- 1/8” Allen wrench — for the handle’s hex set-screw
- 1¼” socket OR adjustable wrench — for the bonnet nut
- Strap wrench (recommended) — to grip the bonnet nut without scratching the finish
- Torque wrench (optional but useful) — to hit Delta’s spec on reassembly
- Phillips screwdriver — for the handle’s decorative cap, if your model uses one
Parts:
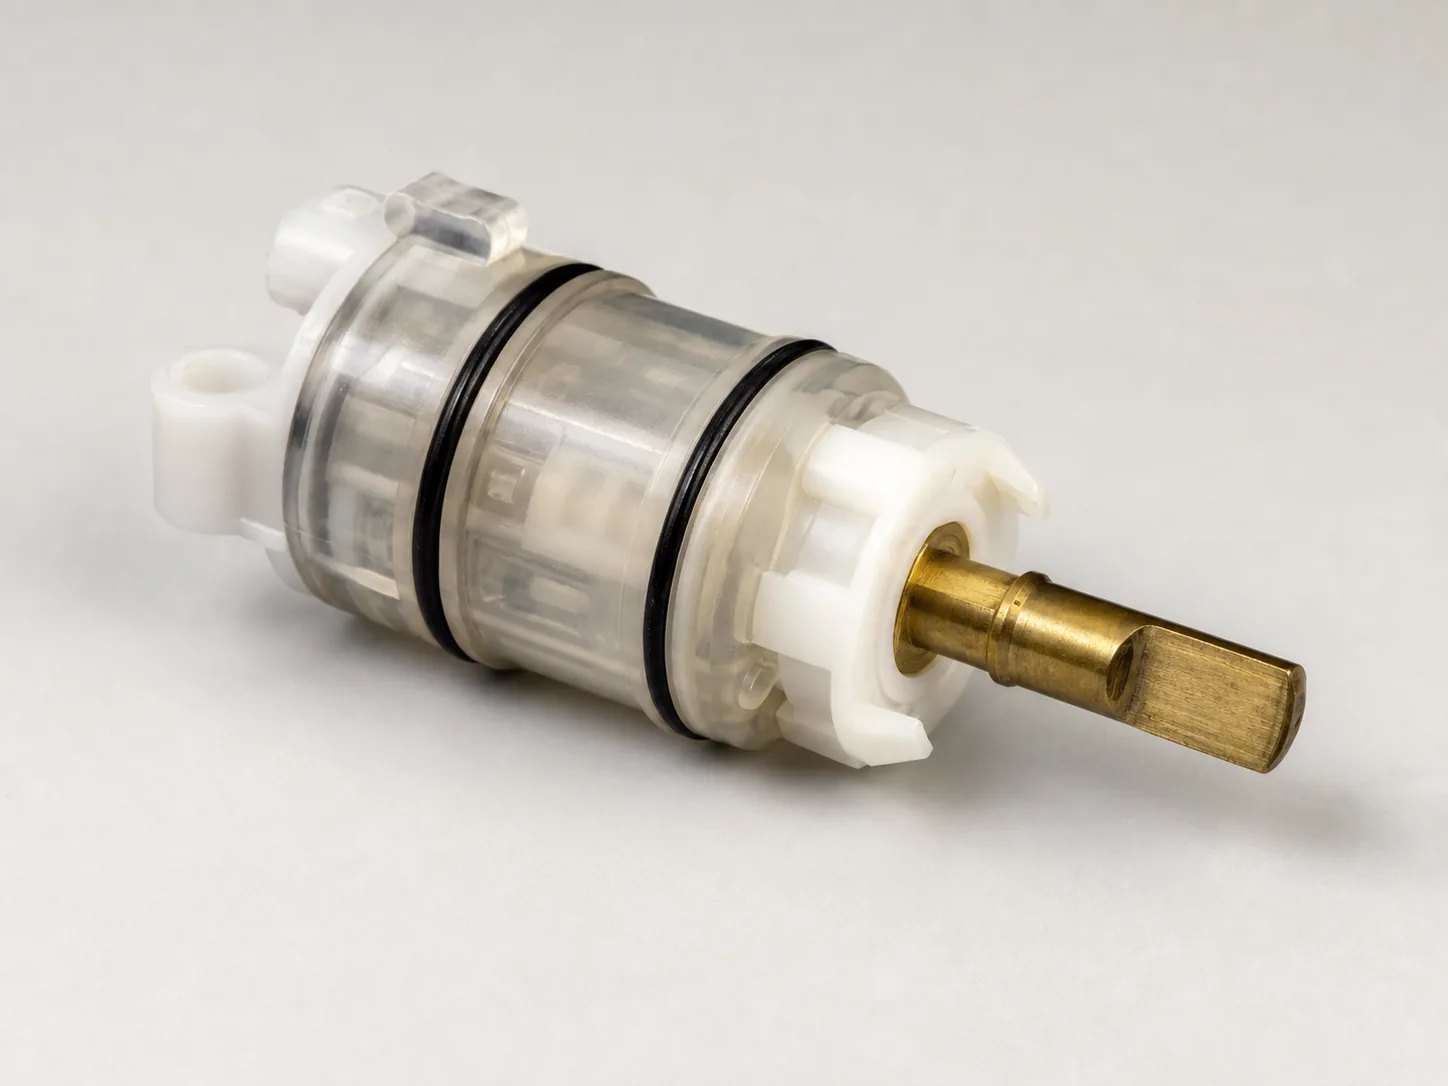
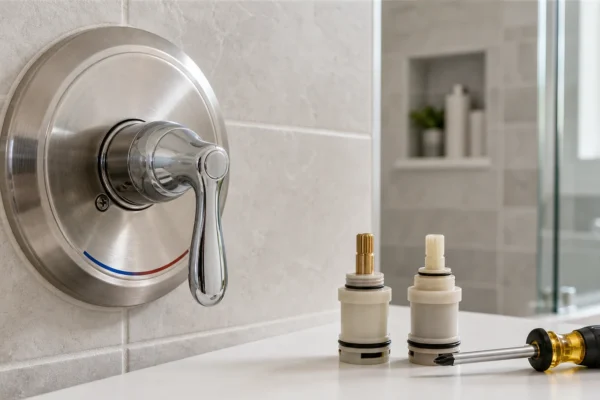
- Replacement Delta cartridge — match your existing model. Common Delta cartridges for single-handle Monitor/MultiChoice 13/14-series tub and shower valves include RP19804 (current OEM pressure-balance, white cap, ~$75) and RP46074 (equivalent OEM cartridge released ~2015, ~$71). For MultiChoice 17-series valves, look for RP46463 (often sold as the RP48026 kit). Note: RP1740, RP25513, and RP47422 are two-handle stems — they do NOT fit single-handle Monitor faucets. Bring the old cartridge to the store if you’re unsure, or use Delta’s online parts finder
- Plumber’s grease (silicone-based, NSF-61 rated) — small dab on the new cartridge’s O-rings during reassembly
What you do NOT need despite what some guides say:
- Tongue-and-groove pliers (channel-locks) on the bonnet nut — Delta explicitly forbids these in their installation manual. They damage the nut and can crack the valve body. Use a proper wrench or socket.
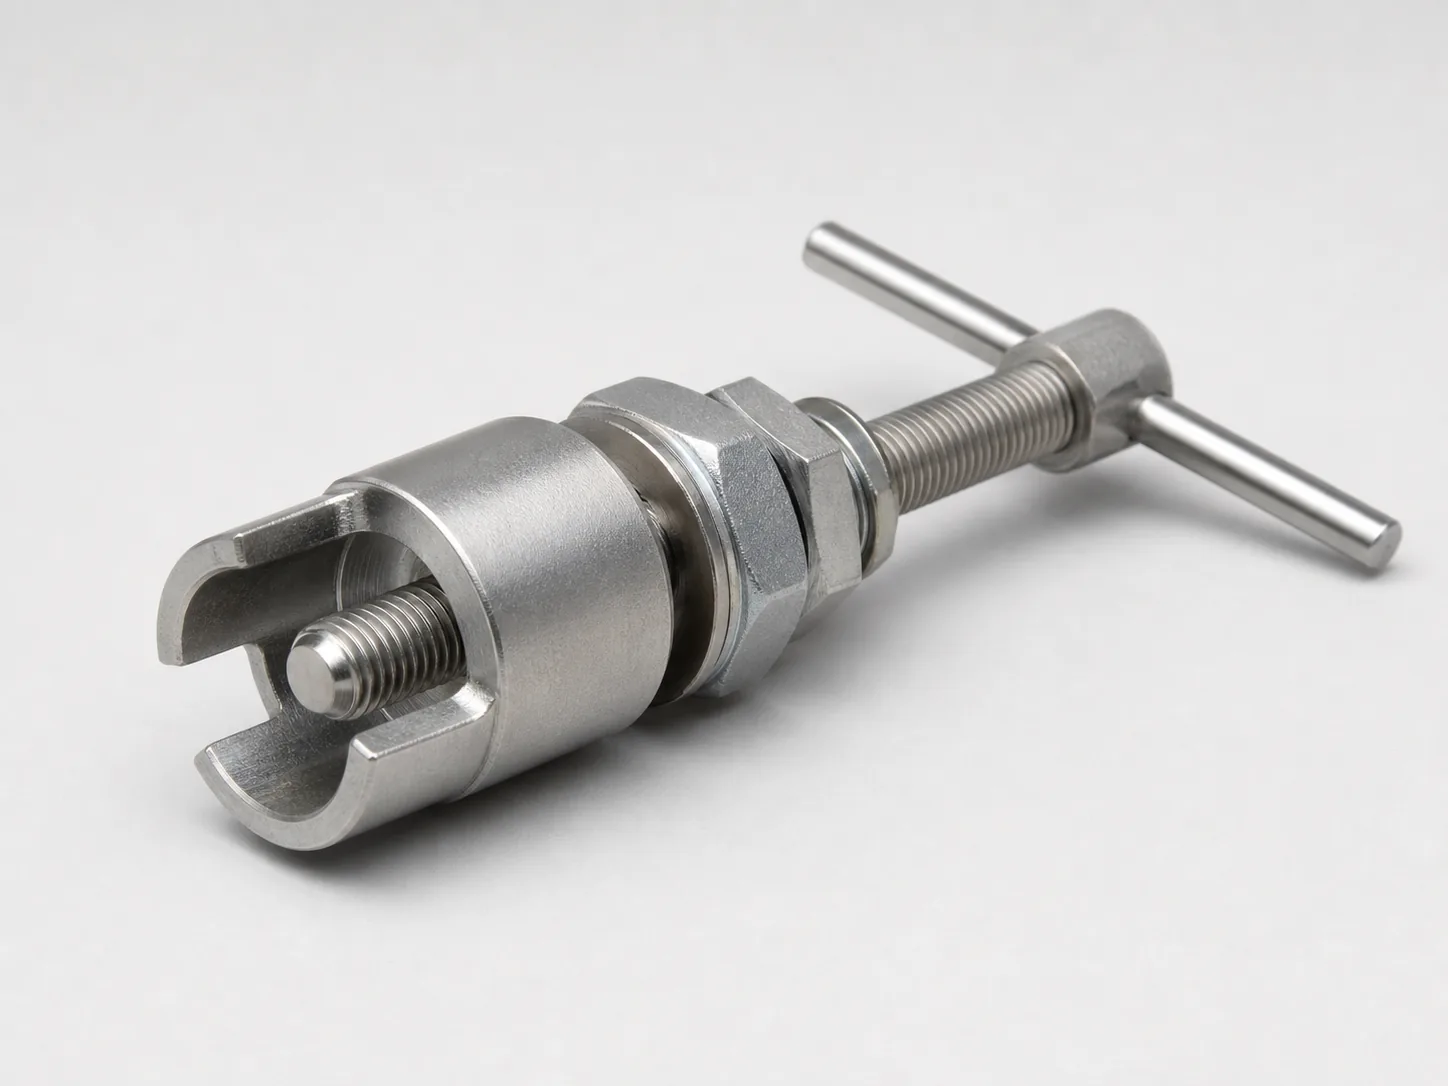
- A Delta-specific cartridge puller (e.g. Delta RP25594 or aftermarket Ona puller) — only needed if the cartridge itself is corroded and seized in the valve body. For most installs, the cartridge lifts straight out by hand. Penetrating oil (PB Blaster, Kroil) and gentle rocking will free most stuck cartridges before a puller is required.
How to Replace a Delta Shower Cartridge: Step-by-Step
Shut Off the Water and Relieve Pressure
The first physical step in how to replace a Delta shower cartridge is shutting off the water. Under the sink, locate the two angle-stop valves (one on the hot line, one on the cold). Turn each clockwise until firm. Then open the faucet (both handles or single-handle full hot, then full cold) to verify no flow AND to relieve trapped line pressure. You should get a brief burst of water that quickly subsides, then nothing.
If your under-sink shutoffs are seized, corroded, or won’t fully close — stop and call a plumber. A shutoff valve that breaks open inside the wall turns a $25 cartridge replacement into a $1,500+ wall-and-flooring rescue. Don’t force it.
Remove the Handle
The handle’s retaining screw is usually a small set-screw under the handle base — accessible via a 1/8” Allen wrench. On many 1700-series faucets the set-screw is hidden under a plastic decorative button or cap on the handle’s top; gently pry that cap off with a flathead screwdriver to expose the set-screw underneath.
Once you’ve backed the set-screw out (don’t remove it entirely — just loosen until the handle releases), the handle should slide straight up off the cartridge stem. If it sticks, gently twist or wiggle while pulling — corrosion at the stem-handle joint is common. Avoid hitting it with a hammer; if it really won’t budge, a Delta-specific handle puller is the right tool, but most don’t need it.
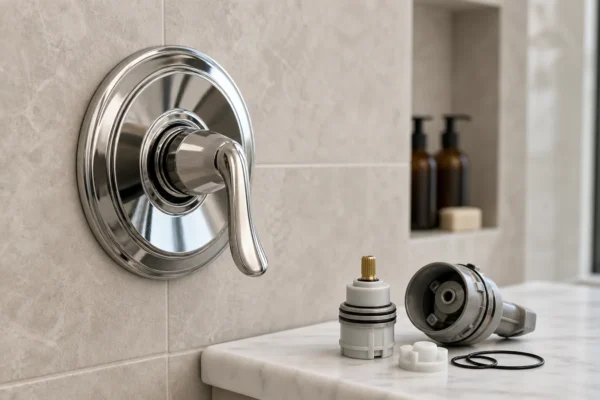
Remove the Bonnet Nut
With the handle off, you’ll see the large brass bonnet nut threaded onto the valve body. This nut holds the cartridge in place under pressure.
Wrap a strip of cloth around the bonnet nut (protects the finish) and use either a 1¼” socket or an adjustable wrench to turn it counterclockwise. A strap wrench is even better — same grip, no scratch risk.
Do not use channel-lock pliers here. Delta’s installation manual explicitly forbids it because the pliers’ teeth deform the nut and stress the valve body. If you don’t have a proper wrench, a strap wrench is $10 at any hardware store and works for both removal and reinstall.
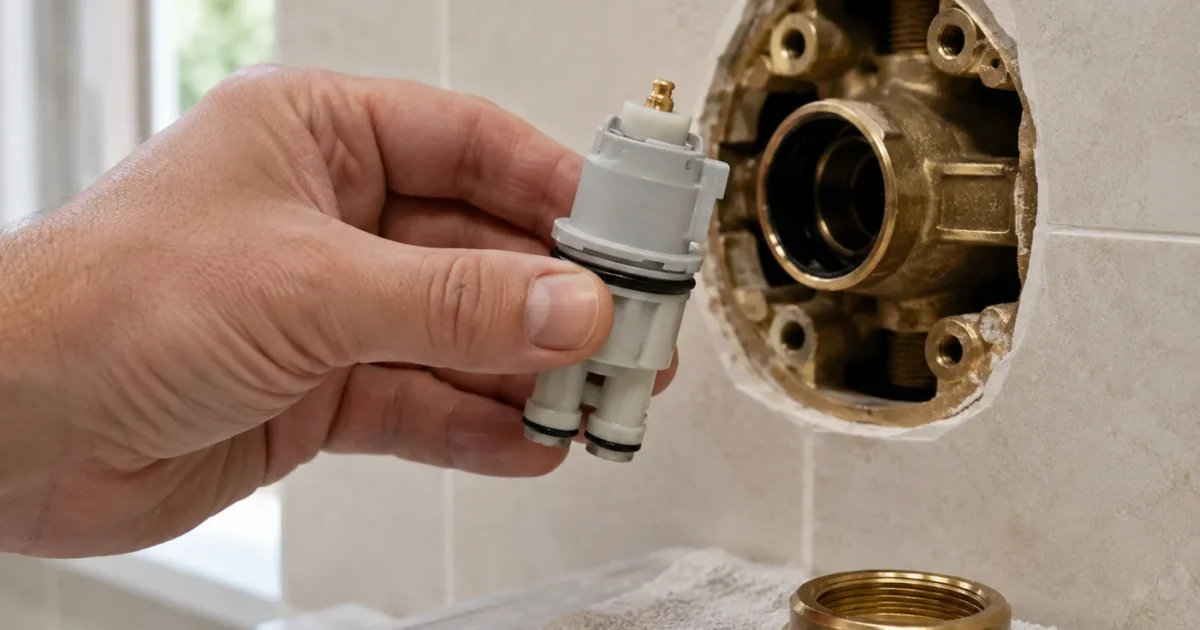
Pull the Old Cartridge Out
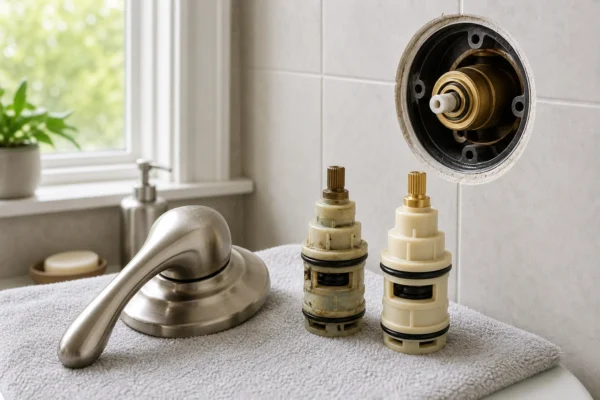
With the bonnet nut removed, the cartridge should lift straight up out of the valve body. It may need a small wiggle or twist to release the bottom O-ring seal — that’s normal. Note which way the cartridge was oriented (look for the “HOT SIDE” label and the two plastic guide pins on the bottom) and discard it.
For MultiChoice valves, before pulling the cartridge you’ll need to remove the internal service stops that sit on top of it: the temperature limit stop, the key stop, and the stop tube, in that order. These are small plastic and brass parts that come straight out by hand. Set them aside on a clean rag — you’ll reinstall them after the new cartridge is seated. If any of these stops fall down the drain or behind the wall, you’ll be ordering replacement parts before you can finish the job.
If the cartridge is stuck in the bore, apply penetrating oil (PB Blaster, Kroil) around the cartridge base, wait 10–15 minutes, and try gentle rocking with steady upward force. Most stuck cartridges release this way. A cartridge puller is the next step only if oil and rocking fail.
Take a 30-second moment to inspect the valve body bore — the cylindrical cavity the cartridge sat in. If you see white or brown mineral crust, wipe it out with a clean rag. If the bore looks scratched, scored, or pitted, the new cartridge won’t seal well — at that point you’re likely looking at faucet replacement, not just cartridge replacement.
Install the New Cartridge
This is the step where most attempts at how to replace a Delta shower cartridge fail. The new cartridge has two plastic guide pins on the bottom that align into matching holes in the valve body. Forcing the cartridge in misaligned cracks the pins, which then prevents proper sealing.
Look down at the valve body to identify the two matching slots. Orient the new cartridge so the pins align with them. Slide the cartridge straight down — it should drop into place with no resistance. If it won’t seat fully, back it out and re-align the pins. Never force it.
The bottom O-ring seal on the cartridge (“T” seal) should already be in place from the factory. Apply a small dab of NSF-61 silicone plumber’s grease to the cartridge stem and the O-ring before installation — slows future scale adhesion and makes the next replacement easier.
Important on cartridge orientation: Delta cartridges have a “HOT SIDE” label stamped on the body that should face the hot inlet (normally the left side in standard plumbing). Unlike Moen’s 1225, however, Delta cartridges are fully reversible by 180° rotation — if your hot and cold are reverse-plumbed (which sometimes happens in back-to-back installations), simply rotate the cartridge so the “HOT SIDE” label faces your hot inlet. Align the guide pins, confirm the label orientation, then push it home.

For MultiChoice valves, reinstall the stop tube, key stop, and temperature limit stop on top of the seated cartridge — in that order — before you put the bonnet nut back on. Missing or out-of-order stops will prevent proper sealing and can cause water to flow from the tub spout continuously.
Torque the Bonnet Nut
This is the second spot most DIY guides skip — and the reason a lot of “completed” cartridge swaps end up leaking around the bonnet nut.
Delta’s spec is 70–100 inch-pounds of torque on the bonnet nut. If you have a torque wrench, set it to 85 in-lb and tighten until it clicks.
If you don’t have a torque wrench, Delta’s manual notes that 9–12 pounds of force on an 8-inch wrench yields roughly the correct range. In practice: snug the nut hand-tight, then add about a quarter-turn with firm steady pressure on an 8” wrench. Don’t crank with your full weight — that’s how the plastic guide pins crack from above.
Under-torquing means the bonnet won’t fully compress the bottom seal — you’ll get a leak around the cartridge. Over-torquing cracks the cartridge plastic from above. The torque spec is real; respect it.
Reassemble and Test Before Final Closure
Test before finalizing. Slide the handle back onto the stem but don’t snug down the set-screw yet. Turn on the under-sink shutoffs slowly — not full blast. Open the faucet a quarter turn. Watch for leaks around the bonnet nut and at the handle base.
If you see weep at the bonnet, shut off the water, snug the bonnet nut another small turn, and re-test. If you see weep at the handle base, the cartridge may not be fully seated — pull the handle, pull the cartridge, re-align the pins, and reinstall.
Flush the line. Once no leaks, move the handle to the mid-position and run water for 15–30 seconds to flush any debris from the line and clear the new cartridge. Delta’s manual specifically calls for this step in how to replace a Delta shower cartridge — it prevents grit from scoring the new cartridge on its first real flow.
Confirm hot is on the left side of the lever (or proper hot-cold orientation for your specific model). If everything functions, snug down the handle set-screw, reinstall any decorative caps or trim rings, and you’re done.
Common Mistakes (and How to Avoid Them)
When DIY guides on how to replace a Delta shower cartridge fail, it’s almost always one of the same handful of mistakes. Delta’s tech support team sees the same patterns over and over. Ranked by frequency:
-
Forgetting to shut off the water first. Spraying water during disassembly is the most common gotcha. Always shut both angle stops and open the faucet to relieve pressure before anything else.
-
Reusing old seals or skipping new grease. New cartridges come with fresh O-rings — use them. Old grease on new seals causes leaks within weeks.
-
Misaligning the cartridge guide pins. Forcing the cartridge in crooked cracks the pins and prevents sealing. Always align before pushing down.
-
Using channel-lock pliers on the bonnet nut. Delta explicitly forbids this. Damages the nut, stresses the valve. Use a wrench or strap wrench.
-
Skipping the torque spec on the bonnet nut. Either under-tightening (leaks) or over-tightening (cracks). 70–100 in-lb is real.
-
For MultiChoice valves: forgetting to reinstall the stop tube, key stop, and temperature limit stop. These three small internal service stops sit on top of the cartridge and must come out for cartridge removal, then go back in (in that order: stop tube, key stop, temperature limit stop) before the bonnet nut is reinstalled. Skip them and water flows continuously from the tub spout, or the cartridge can’t fully seat. Drop one down the drain and you’re ordering replacement parts before you can finish.
-
Dropping the handle set-screw or pins down the drain. Plug the drain with a rag before disassembly. Small parts down the drain are a separate disaster.
-
Not testing before final reassembly. Always test for leaks with the handle loose, before snugging set-screws and trim. Catching a leak after full reassembly means doing the work twice.
When the Cartridge Isn’t the Problem
If you went through how to replace a Delta shower cartridge above and the drip is still there, the cause is somewhere else. Three most common:
- Corroded valve seat inside the valve body. Mineral pitting on the metal surface the cartridge presses against. A new cartridge can’t seal against a damaged surface. Fix: light resurfacing with a brass brush if possible; faucet replacement if pitting is deep.
- Wrong cartridge model. Delta has several cartridges that look similar but aren’t interchangeable (RP46074 vs RP19804, for example). Take the new and old cartridges to the hardware store and compare side-by-side, or check the model on Delta’s parts finder.
- Damaged cartridge from installation. Cracked pins, scored O-ring during forcing. Inspect the cartridge you just installed; replace if compromised.
For the broader diagnostic flow, see the Complete Guide to Faucet Repair and Why Is My Faucet Leaking. If a fresh attempt at how to replace a Delta shower cartridge still leaves the leak in place, the cause is somewhere outside the cartridge entirely.
Quick Reference
When you’ve finished learning how to replace a Delta shower cartridge, this table covers the most common post-install issues you’ll hit on subsequent jobs:
| Symptom | Most likely cause | What to check |
|---|---|---|
| Bonnet nut leaks | Under-torqued, missing/damaged bottom seal | Re-torque to 70-100 in-lb; verify O-ring intact |
| Handle base leaks | Cartridge not fully seated | Pull cartridge, re-align pins, reinstall |
| Drip continues from spout | Wrong cartridge or scored valve seat | Verify part number; inspect bore for pitting |
| Hot/cold reversed | Internal cartridge orientation | Remove cartridge, flip 180°, reinstall (rare on Delta) |
| Handle won’t go on | Wrong-direction installation or cartridge upside-down | Verify pins seated; check handle alignment |
How do I know it’s the shower cartridge and not something else?
A cartridge points itself out by a drip that won’t stop with the handle off, water that won’t get fully hot or cold, or a handle that’s hard to turn. First rule out a clogged showerhead and a handle that isn’t reaching its off position.
Which Delta shower cartridge do I need?
It depends on your valve generation – Delta’s cartridges are NOT interchangeable across series, so confirm your exact valve and cartridge model before buying rather than guessing from the trim.
Do I need to shut off the water to replace it?
Yes – shut off the shower’s supply (the integral stops behind the trim if it has them, otherwise the home’s main), then open the handle to relieve pressure and confirm the water is off before removing anything.
Why is there no hot water after I replaced the Delta cartridge?
The rotational limit stop is set wrong – it controls how far the handle turns toward hot. Reset it per the cartridge instructions; this is the single most common post-replacement mistake.
What if the cartridge is seized and won’t come out?
Don’t force it against the in-wall valve – a cartridge puller is the right tool for a stuck one, but if it still won’t move and the valve body starts to shift, stop and call a plumber before you damage the rough valve behind the tile.
What to Do Next
Once you know how to replace a Delta shower cartridge and the faucet runs clean, you’ve handled one of the most expensive plumber-visit avoidances in DIY plumbing. The skill of how to replace a Delta shower cartridge transfers to most Delta 1700-series and MultiChoice installations; you’re now equipped to handle the rest.
For other faucet repairs in the Pillar 1 cluster, head to the Complete Guide to Faucet Repair — the hub for all our cartridge, valve, drain, and identification guides.
If you have a Moen rather than a Delta, the Moen 1225 cartridge has a different procedure (specifically, the U-clip retainer and the cartridge-rotation step). That’s covered in the upcoming Moen cartridge replacement guide — sign up for the email list below to know when it ships.
Sources
This guide draws on manufacturer installation documentation, plumbing trade resources, and current pricing data. Specific authoritative sources:
- Delta Faucet Installation Instructions & Service Parts — 1700-series and MultiChoice cartridge procedures, including the 70-100 in-lb bonnet-nut torque spec and Monitor 13/14 vs. 17 cartridge part numbers (RP19804, RP46074, RP46463)
- Delta Limited Lifetime Warranty — homeowner warranty policy covering free cartridge replacement for the original purchaser’s lifetime of ownership
- Home Depot Faucet Repair Guides — valve seat assessment, cross-brand troubleshooting, paper-towel diagnostic for leaks
- Roto-Rooter Plumbing Basics — corroded valve seat as a faucet-drip cause; resurfacing vs. replacement guidance
- Angi 2026 Faucet Repair Cost Data — pricing benchmarks for plumber labor and parts
- Family Handyman — Plumbing Repairs — DIY procedure cross-reference for cartridge and valve diagnostics
- This Old House — Plumbing How-Tos — installation and diagnostic cross-reference for Delta and other single-handle faucets
Pricing reflects typical U.S. retail and labor costs as of May 2026.
Educational content only. Not a substitute for licensed professional advice. Local plumbing codes vary by jurisdiction. Use of any guidance from this guide is at your own risk.
Get the homeowner’s plumbing repair toolkit checklist — the tools, parts, and decisions every homeowner should have on hand. [Free download — enter your email]
Parts for this repair
As an Amazon Associate, plumbingbythebook earns from qualifying purchases. Links below are affiliate links — they cost you nothing extra.
- Delta RP46074 MultiChoice Universal Shower Cartridge — OEM cartridge for Delta MultiChoice 14 series single-handle tub/shower valves — the part this repair is built around.
- Danco 80363 Universal Faucet O-Ring Assortment (125 pc) — Spare o-rings for reseating the valve cleanly during the cartridge swap.
Tools for this repair
As an Amazon Associate, plumbingbythebook earns from qualifying purchases. Links below are affiliate links — they cost you nothing extra.
- Allen / Hex Key Set — The set screw holding most Delta handles is a small hex screw — the right Allen key gets the handle off without stripping it.
- Tongue-and-Groove (Channel-Lock) Pliers — Loosens the bonnet nut that holds the cartridge in the valve body.
- Plumber's Silicone Faucet Grease — Lube the new cartridge o-rings before seating — the skipped step that causes day-one leaks.
- Needle-Nose Pliers — Pulls the U-shaped retaining clip that locks the cartridge in place.
Related guides
How to Identify Your Moen Shower Valve: Cartridge Family and Series [2026]
How to Identify Your Moen Shower Valve: Cartridge Family and Series [2026] Knowing how to identify your Moen…
How to Identify Your Kohler Shower Valve: Rite-Temp, MasterShower, and Cartridge Family [2026]
How to Identify Your Kohler Shower Valve: Rite-Temp, MasterShower, and Cartridge Family [2026] Knowing how to identify your…
How to Identify Your Pfister Shower Valve: Model Number, Cartridge, and Valve Family [2026]
How to Identify Your Pfister Shower Valve: Model Number, Cartridge, and Valve Family [2026] How to identify your…