
A worn flapper is the single most common cause of a running toilet, and replacing it is one of the cheapest, fastest repairs in the house – a $5 to $15 part and about fifteen minutes. This guide on how to replace a toilet flapper covers the part most people get wrong (choosing the right one), the cleaning step most people skip, and how to set the chain so the new flapper actually seals.
Flapper size is the part homeowners most often get wrong, so identify your toilet brand and model first to confirm whether you need a 2-inch or 3-inch flapper.
First: Confirm It’s the Flapper
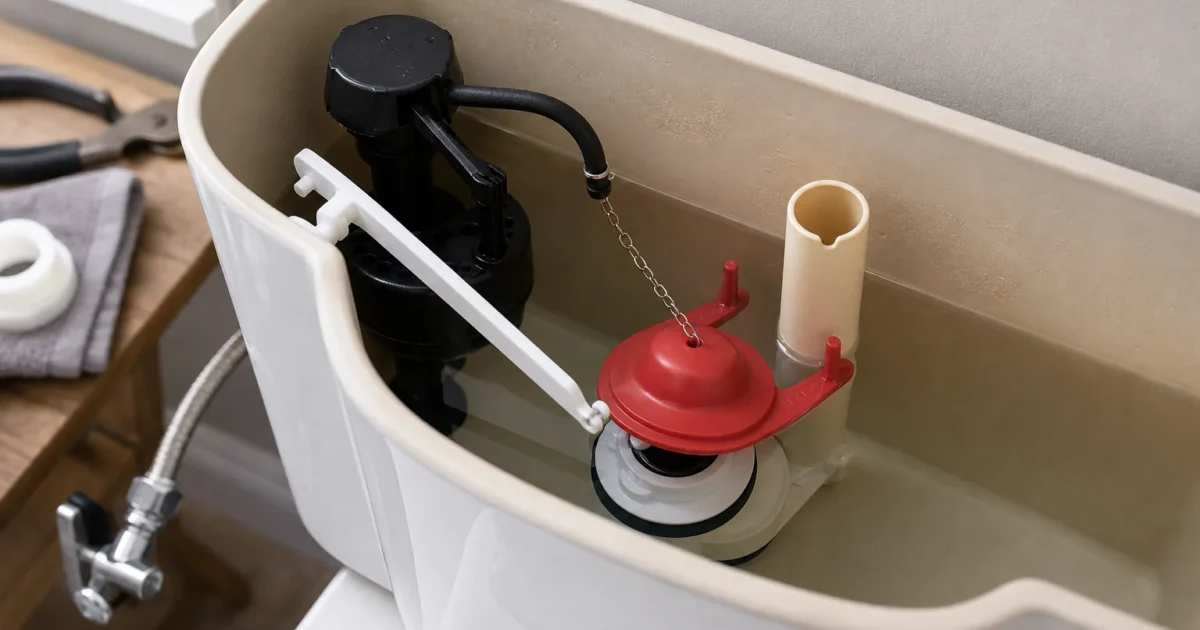
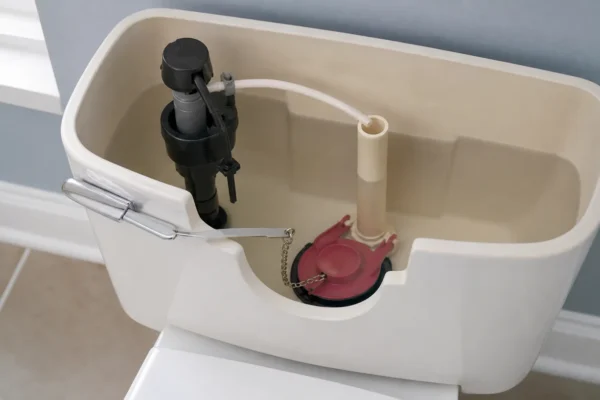
The flapper is the rubber seal at the bottom of the tank that lifts when you flush and drops back to hold water until the next flush. When it stiffens, warps, or stops seating cleanly, water leaks past it into the bowl, the tank level drops, and the fill valve cycles on to top it off – the hiss-and-refill of a running toilet.
A two-minute test confirms it before you buy anything: put a few drops of food coloring in the tank (not the bowl), wait 15-20 minutes without flushing, and check the bowl. If color appears in the bowl, water is leaking past the flapper and it needs replacing (EPA WaterSense). If the tank water keeps rising into the overflow tube instead, that’s a fill-valve or water-level problem, not the flapper – see our running toilet guide for the full diagnosis.
Get the Right Flapper (the Part People Get Wrong)
Flappers are not one-size-fits-all, and grabbing the wrong one is the top reason a “fixed” toilet still runs.
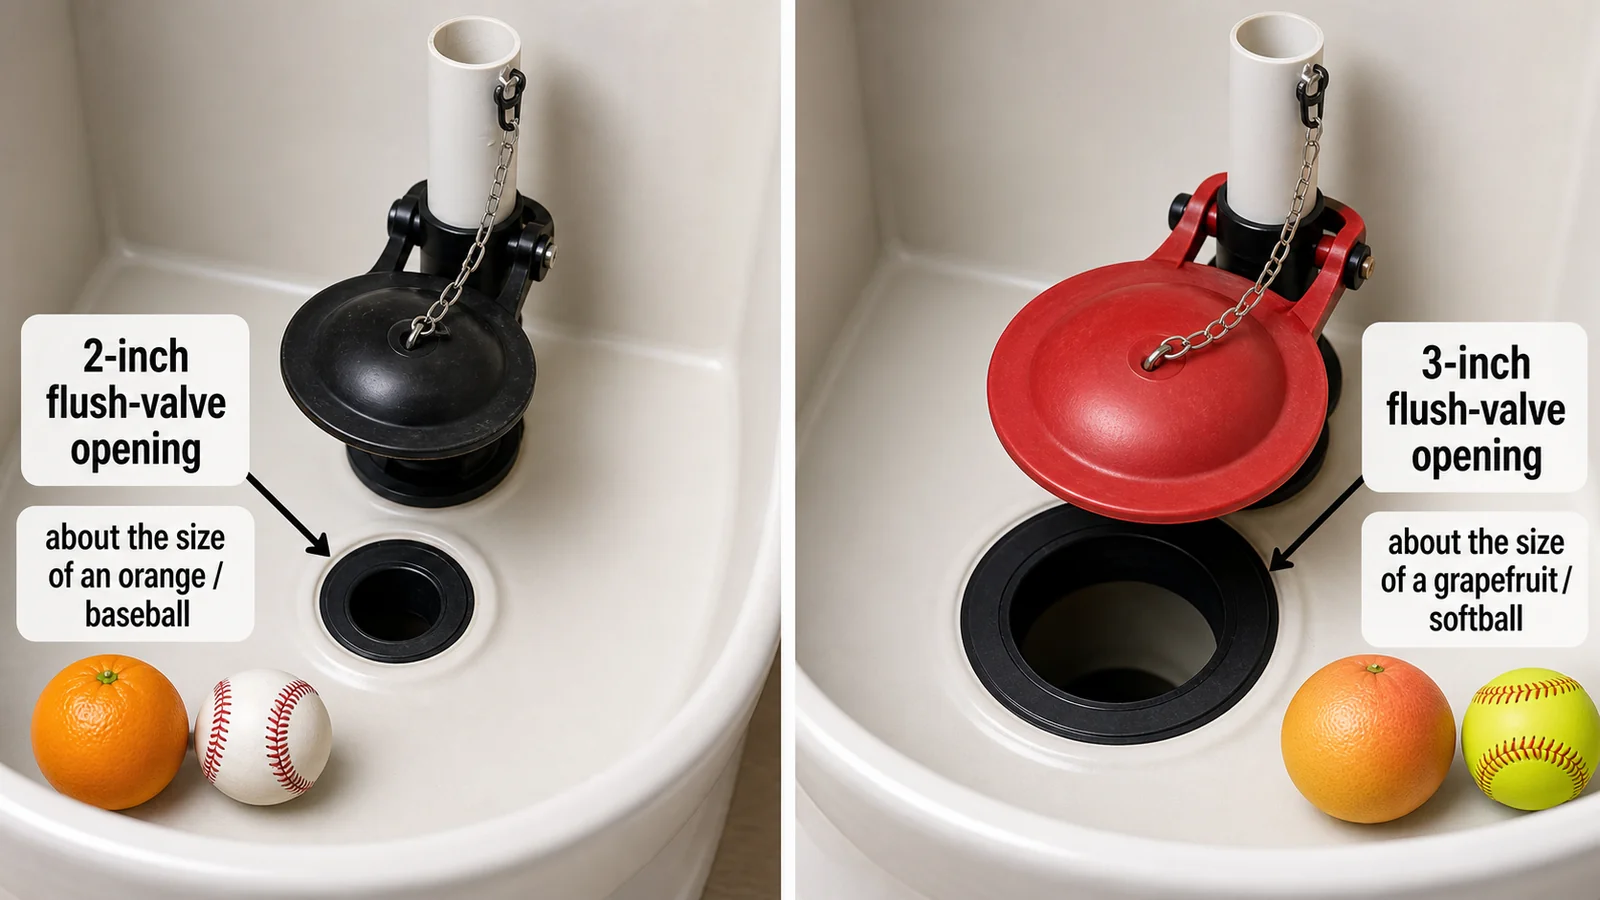
- Size: 2-inch vs 3-inch. Replacement flappers are typically 2-inch or 3-inch, and you match them by measuring the flush-valve opening (the hole the flapper covers) at the bottom of the tank (Lowe’s). Most older toilets use 2-inch; many post-2010 high-efficiency toilets use 3-inch. No tape measure? Two quick shortcuts: a 2-inch opening is about the size of an orange or baseball, a 3-inch opening about a grapefruit or softball. Or measure the old flapper itself end to end – a flapper roughly 3 inches wide is a 2-inch flapper (buy 2-inch); one roughly 4 inches wide is a 3-inch flapper (buy 3-inch). That measure-the-old-part trick is the one that trips people up most, so when in doubt, bring the old flapper to the store.
- Brand/family matters. Manufacturers make proprietary flapper designs, so the safest approach is to bring the old flapper with you (or note the toilet brand and model stamped inside the tank) before shopping (This Old House). Some toilets – Kohler canister-flush, some American Standard and Toto designs – do not use a standard flapper at all and need the brand’s specific part.
A universal red-rubber flapper (Korky or Fluidmaster) fits the large majority of standard 2-inch toilets; the exceptions above are where “universal” fails.
One more thing to check before you buy: how your flapper mounts. Most flappers have two small ears that snap onto pegs on the sides of the overflow tube. But some designs have a ring or collar that slides down over the overflow tube instead. Note which type you have (snap-on ears vs. slide-over-the-tube collar) so the replacement matches – a “universal” flapper usually supports both, but knowing yours saves a second trip.
Tools and Materials
- The correct replacement flapper (matched as above)
- A sponge or rag and a small bucket (for the water left in the tank)
- Gloves (tank water is harmless but not pleasant)
- A few drops of food coloring (to test when you’re done)
No wrenches required for a flapper-only swap – it clips on and off by hand.
How to Replace a Toilet Flapper: Step by Step
Shut off the water
At the stop valve behind the toilet (turn clockwise until it stops). Flush to empty the tank, then sponge out the inch of water left in the bottom so you can work dry.
Remove the old flapper
Unhook the lift chain from the flush handle’s arm, then unclip the flapper’s ears from the pegs on the sides of the overflow tube (or slide the collar off the tube on some designs). It comes off by hand.
Clean the flush-valve seat
This is the step most people skip. Sediment or mineral scale on the seat – the rim the flapper presses against – will stop a brand-new flapper from sealing (Korky). Wipe it with a rag; for hard mineral buildup, gently smooth it with fine-grit emery cloth, then rinse the debris away (This Old House).
Install the new flapper
Clip its ears onto the same pegs (or slide its collar over the overflow tube) so it sits flat and centered over the opening.
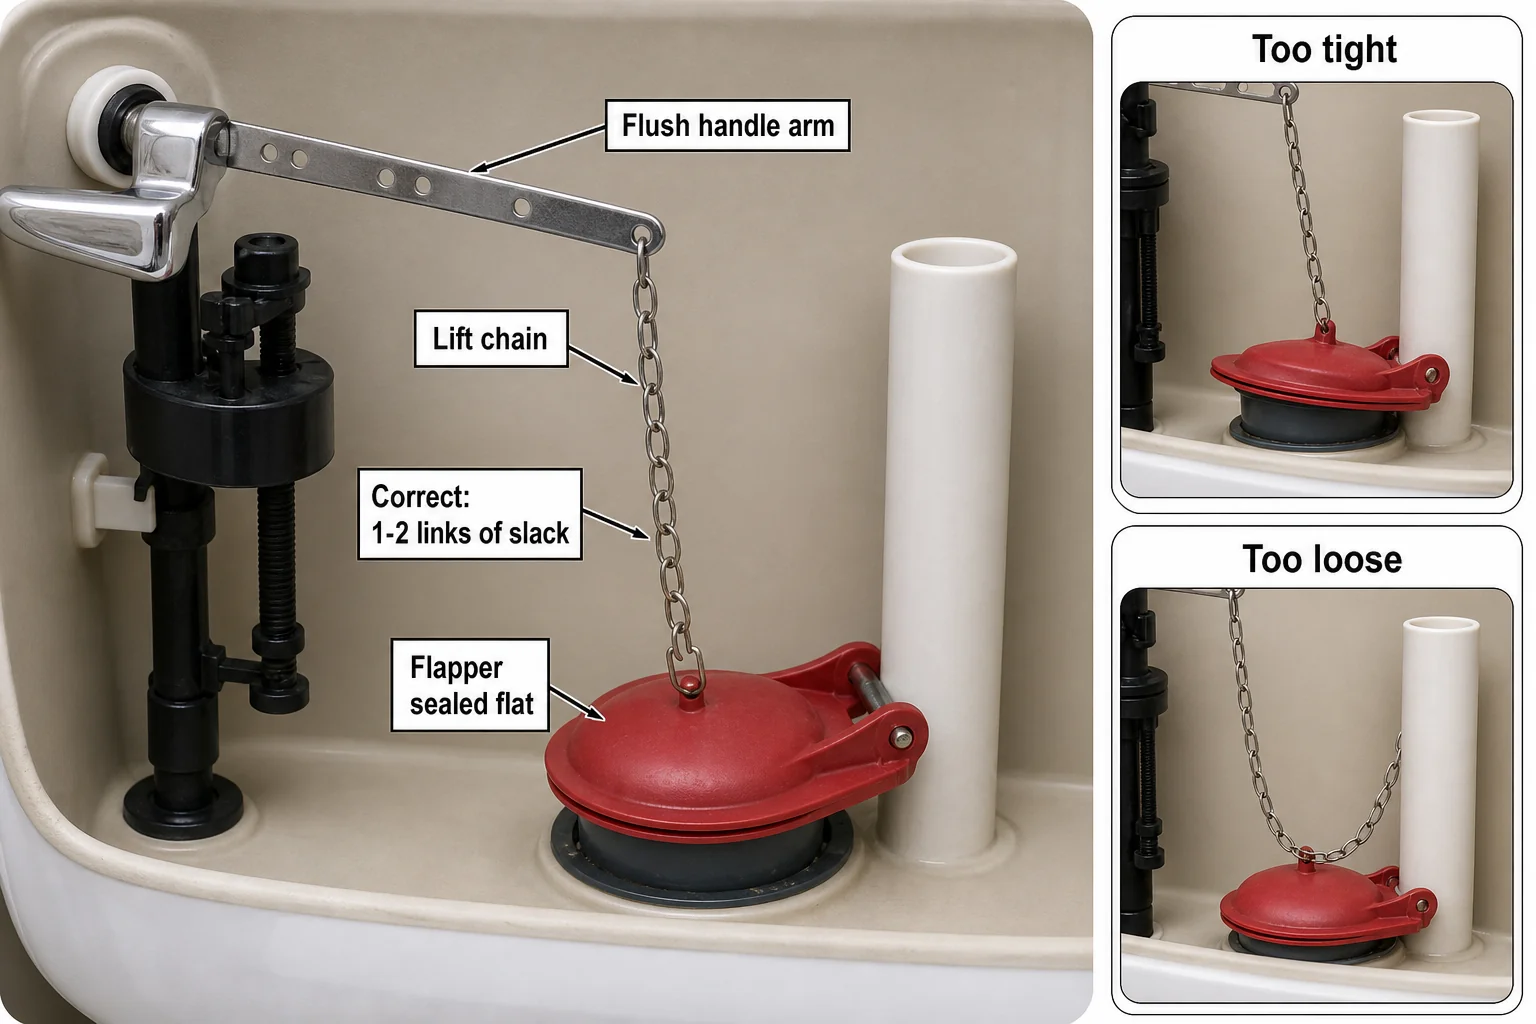
Set the chain slack
Hook the chain to the handle arm with about 1 to 2 links of slack – too loose and the flapper won’t open fully; too tight and it can’t fully close and seal (Korky, Home Depot). The flapper should rest flat when closed and start lifting the instant you press the handle.
Turn the water back on
Let the tank refill.
Test the seal
Do a normal flush and watch the flapper drop and seal. Then run the food-coloring test again – no color in the bowl after 15 minutes means it’s sealed.
Confirm the water level, and tune an adjustable flapper if you have one. Before you started, it helps to mark the water line inside the tank with a pencil; after the new flapper is in and the tank refills, the level should settle back at or just below that mark and below the top of the overflow tube. If the bowl now flushes weakly or runs through water too fast, an adjustable flapper (like the Korky 528MP) has a dial or float you turn to add or shed flush volume – turn it one setting at a time and re-test until the flush is strong but the tank stops cleanly.
Common Mistakes
- Wrong size or brand family – the #1 cause of a still-running toilet after a flapper swap. Match the opening (2” vs 3”) and the brand.
- Chain too tight or too loose – prevents a full open or a full seal. 1-2 links of slack.
- Skipping the seat cleaning – a new flapper can’t seal against a gritty or scaled seat.
- Treating a fill-valve problem as a flapper problem – if water keeps rising into the overflow tube, that’s the fill valve or water level, not the flapper (Home Depot).
- In-tank bleach/chlorine tablets – drop-in tablets that sit in the tank degrade rubber flappers (and other parts) and can even void manufacturer warranties; they’re a leading cause of premature flapper failure (Fluidmaster, Korky).
When It’s Not the Flapper
Replace the flapper and still running? Check, in order:
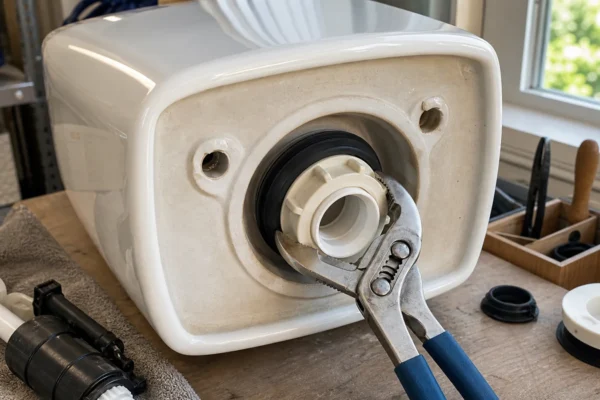
- The flush-valve seat is pitted or cracked (not just dirty). A damaged seat won’t seal against any flapper and may need a flush-valve replacement.
- The fill valve or water level – water trickling into the overflow tube points here, not at the flapper (Kohler).
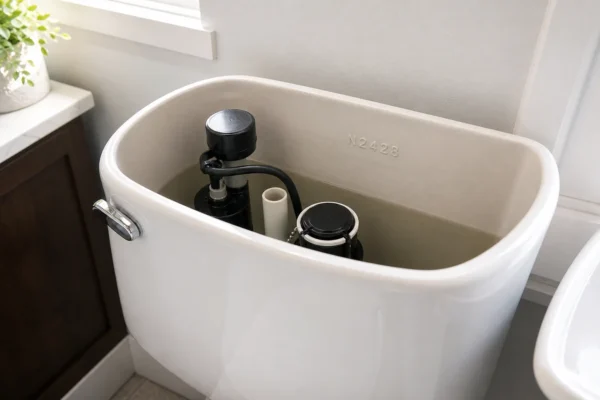
- A canister-flush toilet – if your tank has a tall central tower rather than a hinged flapper, it uses a canister seal, a different part.
A flapper swap itself is firmly DIY – there are no tank bolts to loosen and nothing to over-tighten. Escalate to a plumber only if the repair grows: a corroded shutoff that won’t close, a cracked flush valve requiring the tank to come off, or brittle old plastic you don’t want to force.
How do I know if my flapper is bad?
Do the food-coloring-in-the-tank test. Color in the bowl within 15 minutes means the flapper is leaking.
What size toilet flapper do I need?
Measure the flush-valve opening at the bottom of the tank – about 2 inches or about 3 inches. Most older toilets are 2-inch; many newer high-efficiency toilets are 3-inch.
Are toilet flappers universal?
Mostly, for standard 2-inch toilets – but 3-inch valves, Kohler canister toilets, and some Toto/American Standard designs need the specific part. Match the size and brand.
Why is my toilet still running after I replaced the flapper?
Usually the wrong size/brand, a chain set too tight or loose, or a dirty/damaged valve seat. If water rises into the overflow tube, it’s the fill valve, not the flapper.
How much does a toilet flapper cost?
A universal flapper runs about $5 to $15; brand-specific or canister seals can be a bit more.
How long does a toilet flapper last?
Typically about 5 to 10 years (Korky); hard water and in-tank chlorine tablets shorten that considerably.
Why do my toilet flappers keep wearing out so fast?
The usual culprit is in-tank cleaning tablets – the drop-in bleach/chlorine pucks that sit in the tank chemically degrade the rubber, and hard or well water adds mineral wear on top. Switch to an in-bowl cleaner instead, and a quality flapper should last years rather than months.
Where to Go From Here
If you’re not sure the flapper is the culprit, start with our running toilet guide, which walks through all six common causes. For everything else a toilet throws at you, the toilet repair guide indexes each problem by symptom.
This guide is for general homeowner education and is not a substitute for licensed professional advice. If a repair grows beyond the flapper – a seized shutoff, a cracked flush valve, or removing the tank – consult a licensed plumber.
Parts for this repair
As an Amazon Associate, plumbingbythebook earns from qualifying purchases. Links below are affiliate links — they cost you nothing extra.
- Korky 2002BP Universal Toilet Flapper (2-inch) — Universal 2-inch red-rubber flapper for the standard flush valve on most pre-2010 toilets.
- Korky 6000BP Universal Toilet Flapper (3-inch) — The 3-inch flapper for high-efficiency and most post-2010 toilets — measure the flush-valve opening to confirm.
- Korky 528MP Universal Adjustable Toilet Flapper (2-inch) — 2-inch flapper with an adjustable float to dial in flush volume on a weak-flushing toilet.
Related guides
How to Identify Your Glacier Bay Toilet Parts (the Fluidmaster and Niagara Components Inside) [2026]
How to Identify Your Glacier Bay Toilet Parts (the Fluidmaster and Niagara Components Inside) [2026] The whole trick…
What Size Flapper Do I Need? How to Choose the Right Toilet Flapper and Fill Valve [2026]
Your toilet is running, ghost-flushing, or refilling every few minutes with no one touching the handle. You’ve pulled…
How to Replace a Toilet Flush Valve: Step-by-Step Guide [2026]
The flush valve is the center assembly in your toilet tank — the overflow tube, the valve seat,…