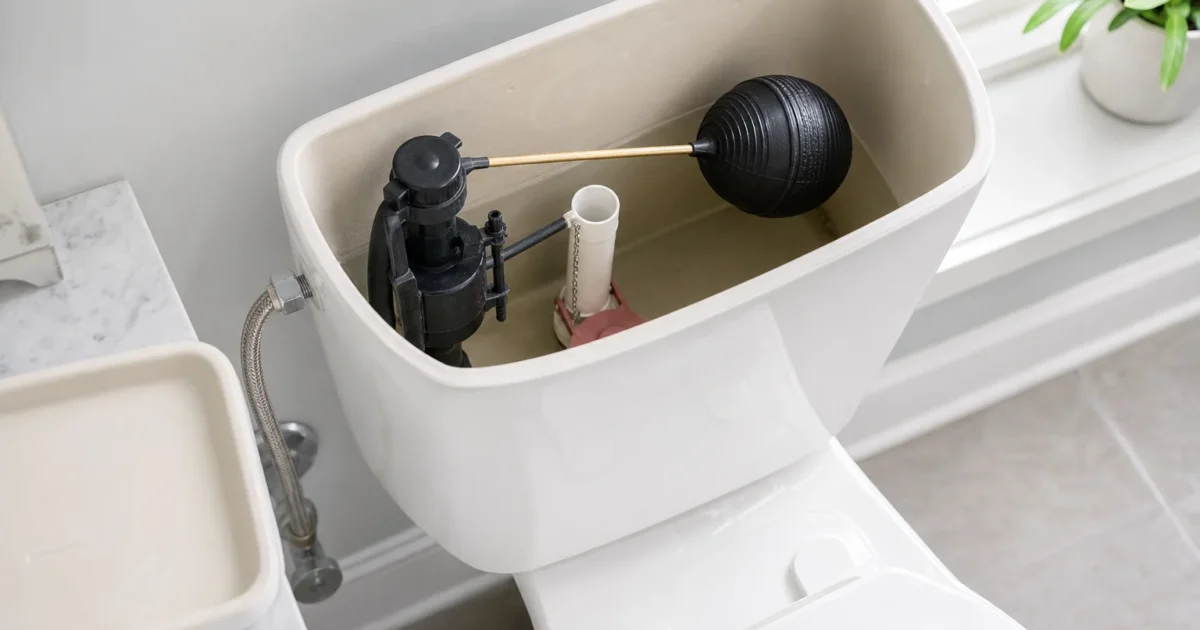
If you can hear water trickling into the bowl long after a flush, or the fill valve cycles for a few seconds every fifteen minutes when nobody touched the handle, you have a running toilet. Why is my toilet running is the most common diagnostic question in residential plumbing, and the answer is almost always one of six things – five of which are a $5 to $25 part and an hour of your time, and one of which is a sign to call a plumber.
The most common fix for a running toilet is a new flapper — here is how to replace a toilet flapper, about a 10-minute, $10 job.
Before you buy a flapper or fill valve, identify your toilet brand and model — the right flush-valve size and brand-specific parts depend on it.
A running toilet is not just annoying. The EPA estimates that nine percent of homes have leaks wasting 50 gallons or more per day, and a single worn flapper can silently leak thousands of gallons a year before you notice it on the water bill. The cost of ignoring it is real; the cost of fixing it usually is not.
This article walks through the six most common causes – ranked by frequency – with the symptom signature for each, the cost and time to fix, and the moment to stop DIY and call someone with a torch.
Why Is My Toilet Running? Start With What You Hear
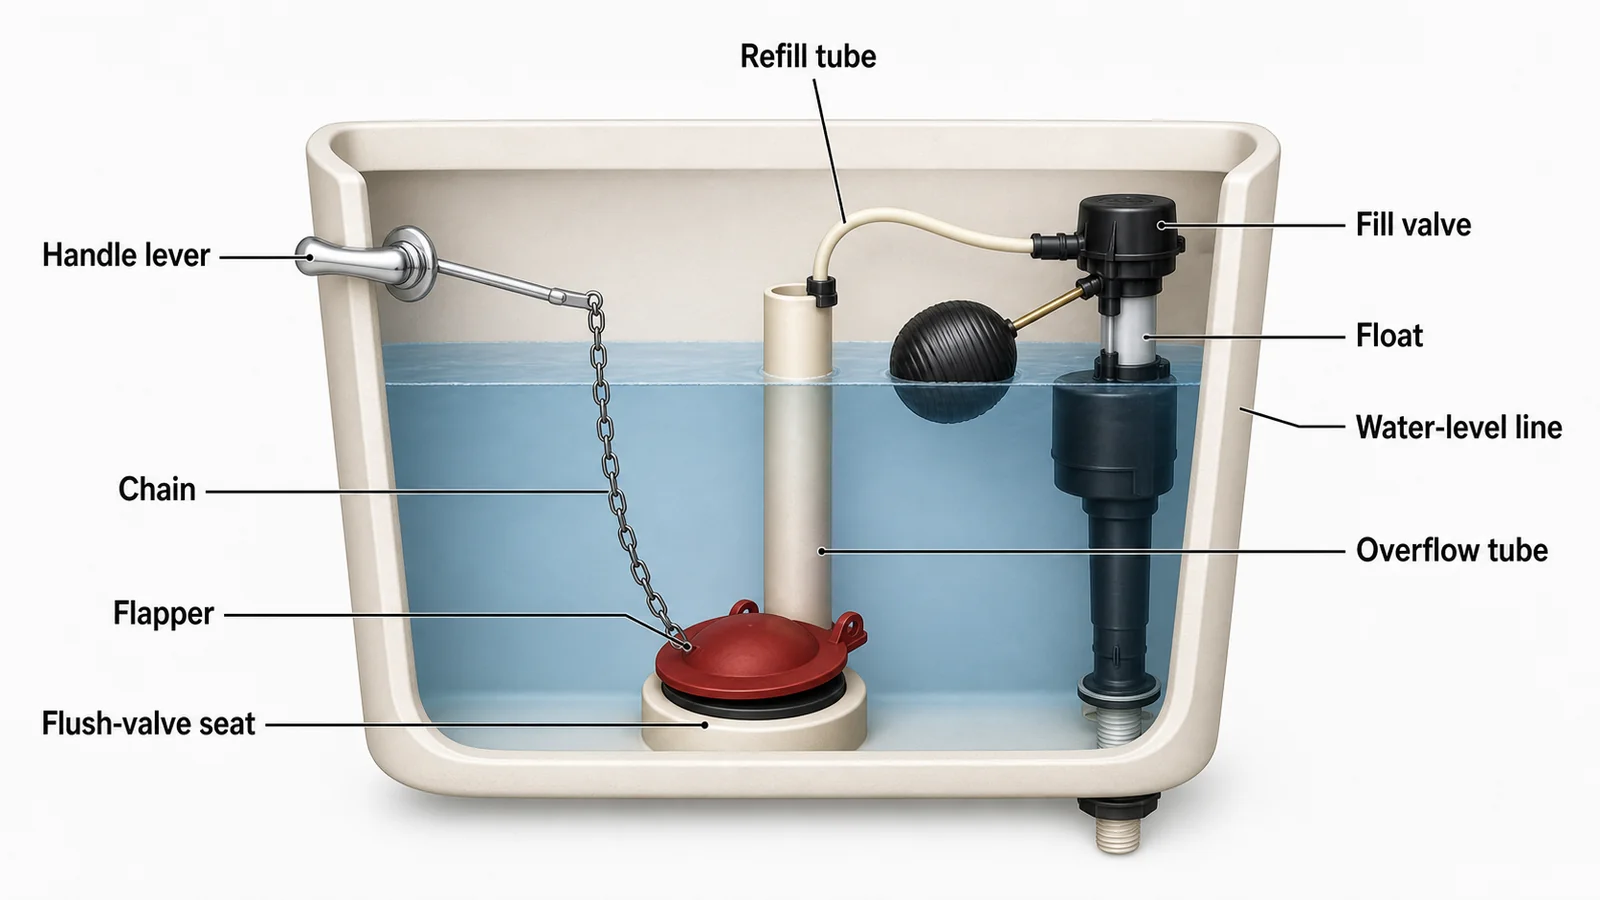
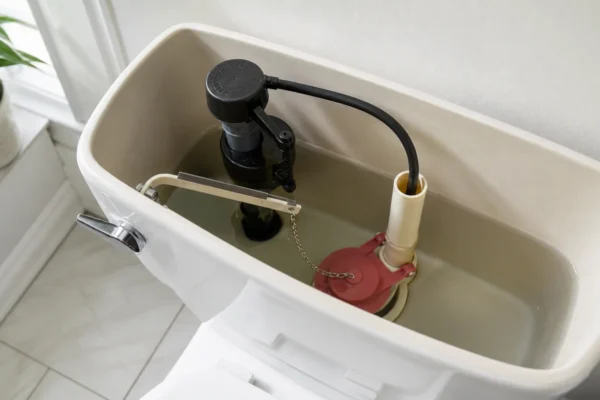
Before the causes, it helps to know the six parts every one of them involves – the diagram above maps each name to where it sits in the tank. The first split is continuous running versus intermittent refilling, because they point at different parts of the tank. If the toilet runs constantly right after a flush and never quiets down, water is going into the overflow tube or the fill valve will not close – causes 2, 3, or 5 below. If the toilet is quiet most of the time but the fill valve kicks on for a few seconds every few minutes or hours, that pattern is called “ghost flushing” or “phantom flushing” and points at a slow tank-to-bowl leak – causes 1 or 6.
If jiggling the handle stops the running, the handle, chain, or lever is probably keeping the flapper from closing squarely – cause 4. If the running starts after recent tank-part replacement, suspect chain length, wrong flapper size, or refill-tube placement before assuming the new part is defective.
A running toilet that changes when another fixture is running can also be a whole-house water-pressure problem. The Spruce says water pressure over 80 psi is probably causing excessive stress on pipes, fittings, and fixtures. A reading above that threshold makes this a whole-house plumber problem, not a flapper problem.
Cause 1: A Worn, Dirty, or Wrong Flapper
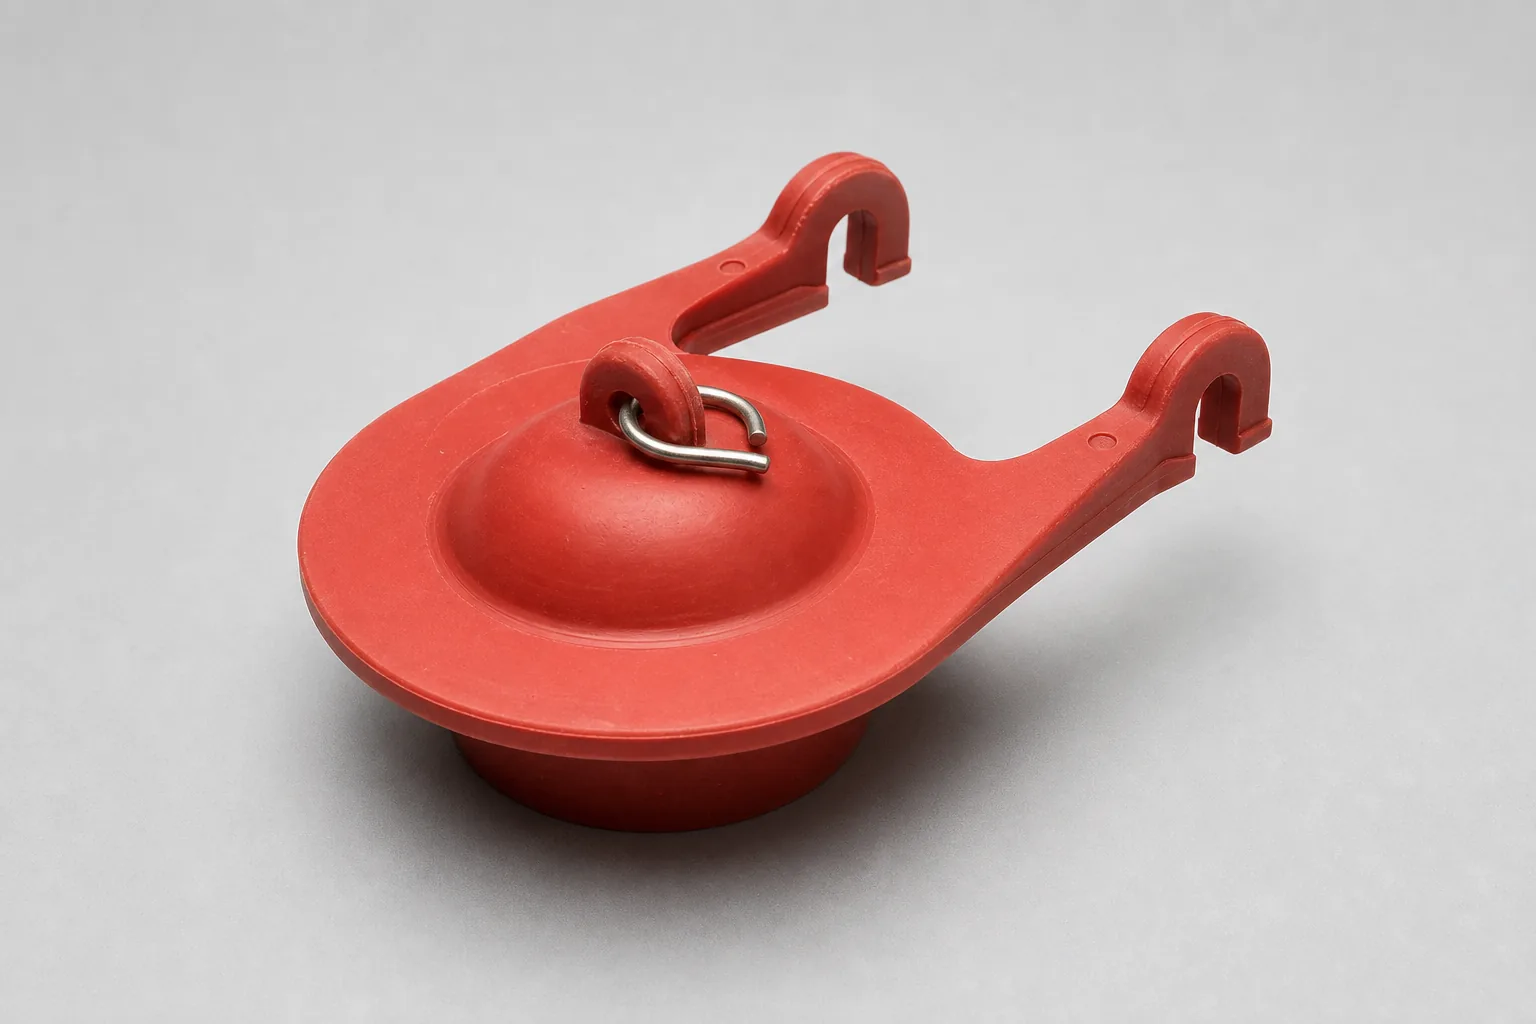
If you’re asking why is my toilet running and the symptom is intermittent refills with occasional silent trickling, this is almost always the answer. The most common cause – by a wide margin – is the flapper or flush-valve seal. Fluidmaster calls the flapper the leading cause of leaking or running toilets, because the flapper is the tank’s drain plug. Any deformation, mineral buildup, chain interference, wrong size, or a rough seat leaves a leak path from tank to bowl, and the fill valve responds by topping the tank back up.
The classic signature is water trickling long after a flush, with an occasional supply-water surge that refills the tank a few minutes later. The dye test confirms it: drop food coloring in the tank, wait fifteen to twenty minutes without flushing, and if color shows up in the bowl, the seal is leaking.
Flappers are wear parts. HomeAdvisor pegs the typical flapper lifespan at four to five years, and tank tablets that contain bleach or chlorine can shorten that life significantly – Fluidmaster recommends avoiding drop-in tank products that attack rubber components.
Fix: clean the flush-valve seat, install the correct replacement seal, and reset the chain slack. A standard 2-inch flapper is the cheapest part here; proprietary 3-inch flappers, TOTO-compatible seals, or canister/tower seals cost more and require an exact-match part. Time: 5-20 minutes. Difficulty: trivial for standard flappers, easy-to-moderate for proprietary canister or tower seals.
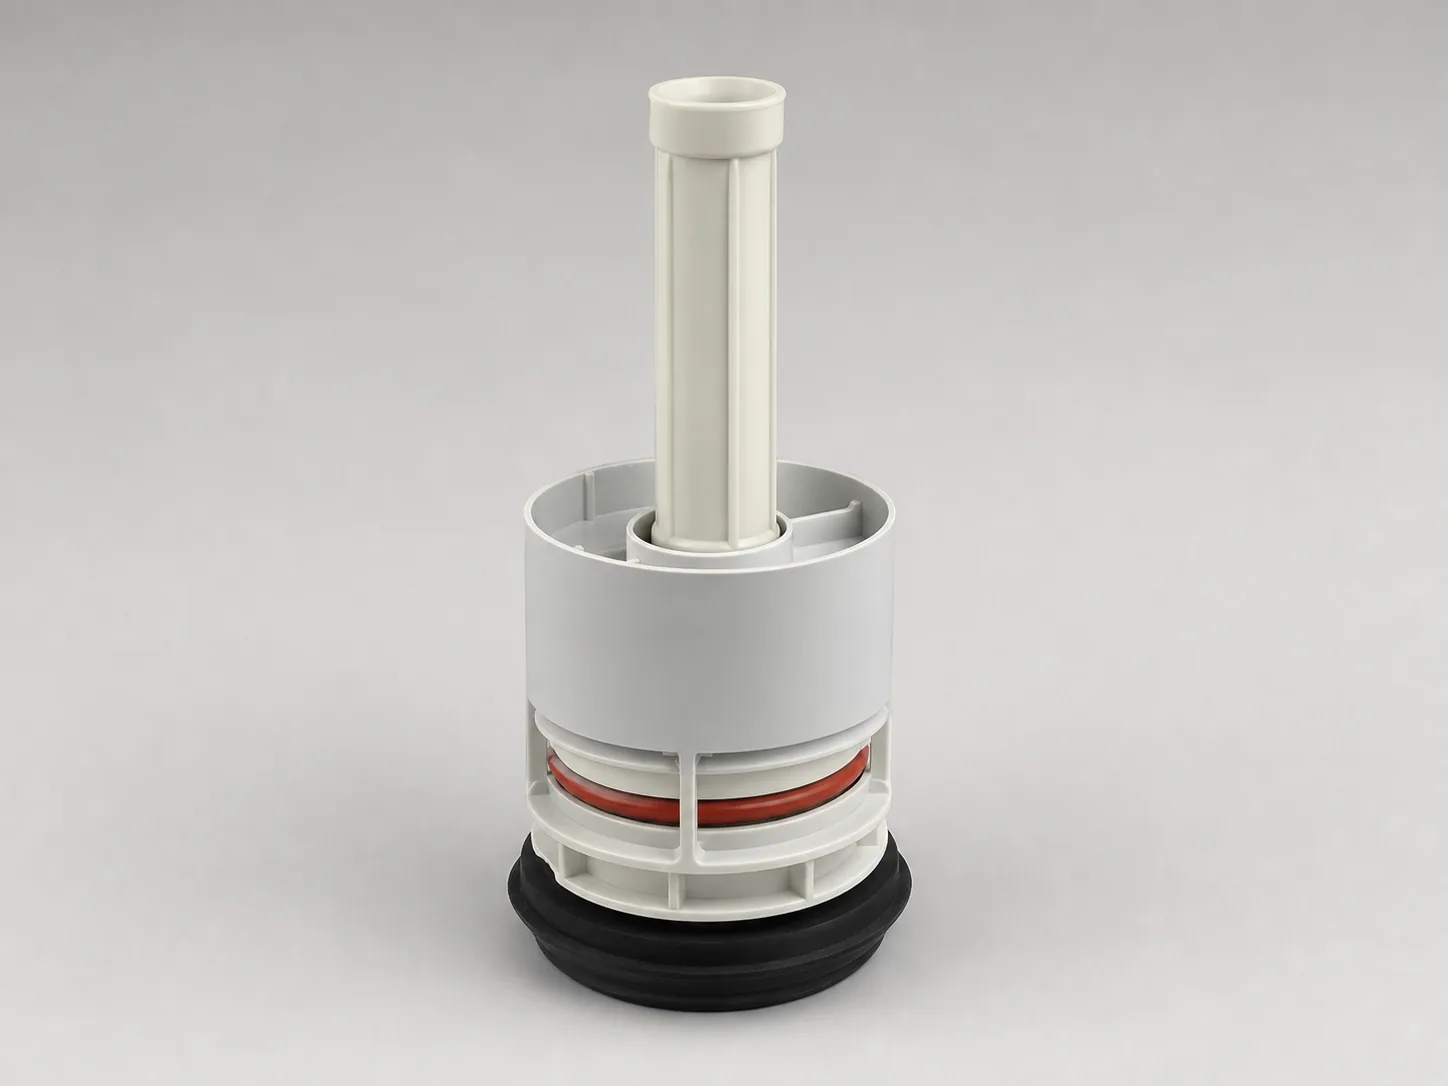
Escalate when: several correct seals have failed, the seat is cracked or rough, the water level drops below the flapper opening with the supply off, or the tank itself appears cracked.
Buying a new flapper? Match it by brand or by drain size.
Cause 2: Fill Valve That Will Not Shut Off
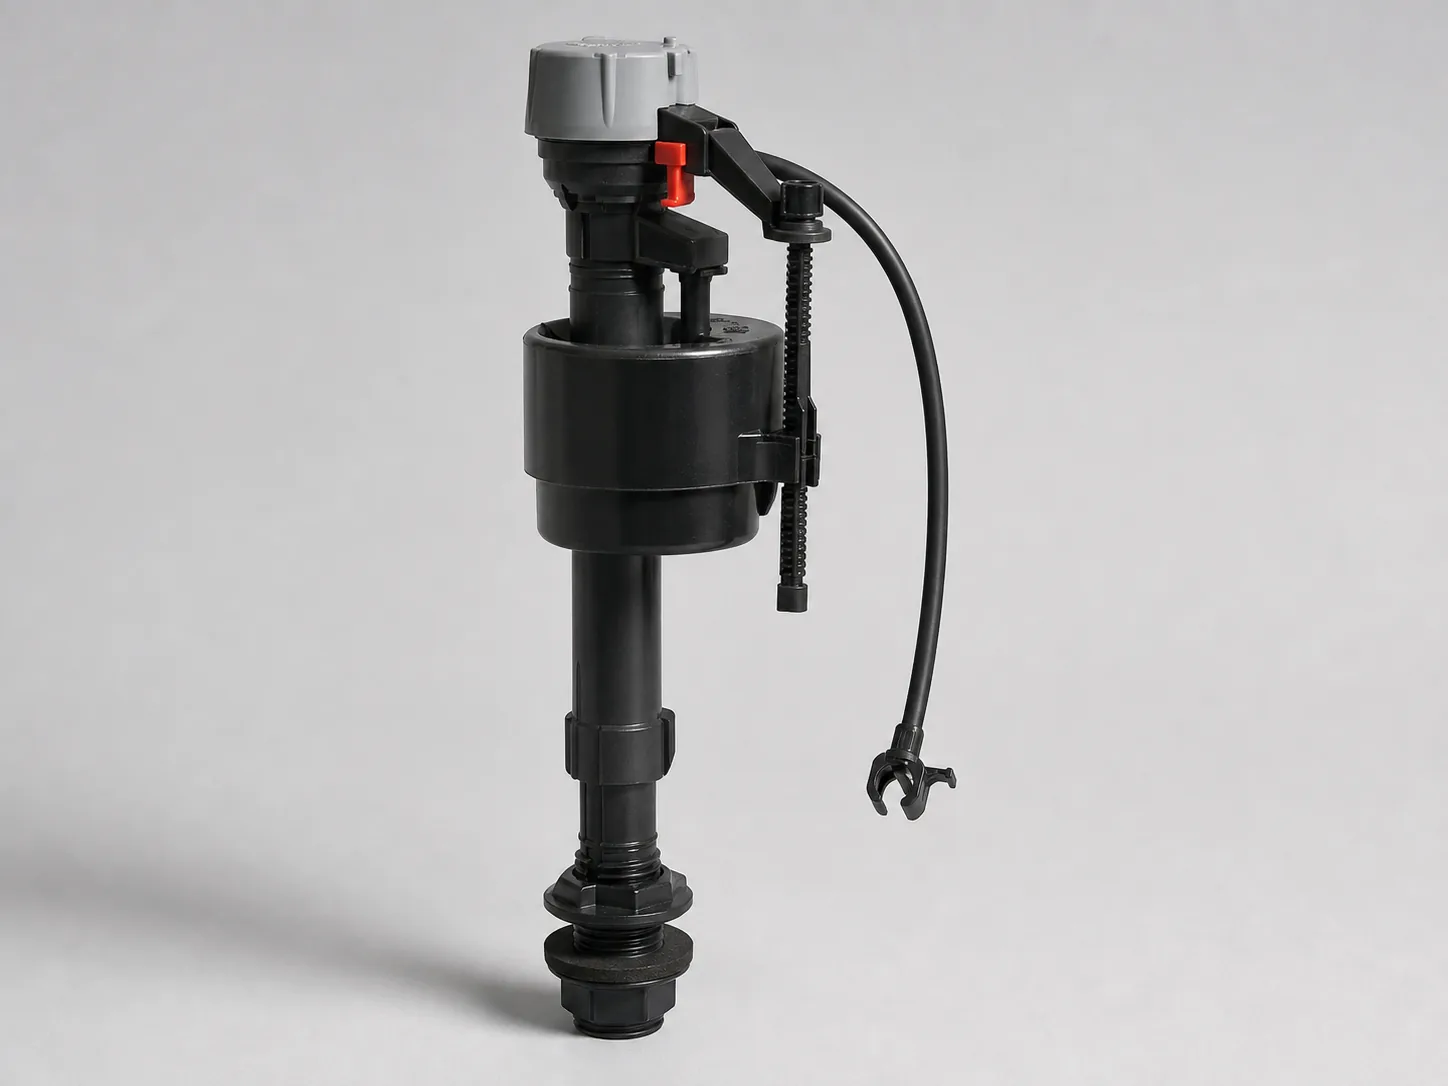
The second bucket is a fill valve that keeps admitting water after the tank is full. The float, diaphragm, cap seal, or internal valve fails to close cleanly, or debris lodges under the cap and prevents shutoff. Fluidmaster notes that debris can appear in the supply line any time the water is on – after a new installation, a few days later, or seven years later.
The signature: continuous hissing, water rising into the overflow tube, a float that does not rise freely, or running that stops when you lift the float by hand. Fluidmaster says fill valves with seven-plus years of use commonly start to wear out internally.
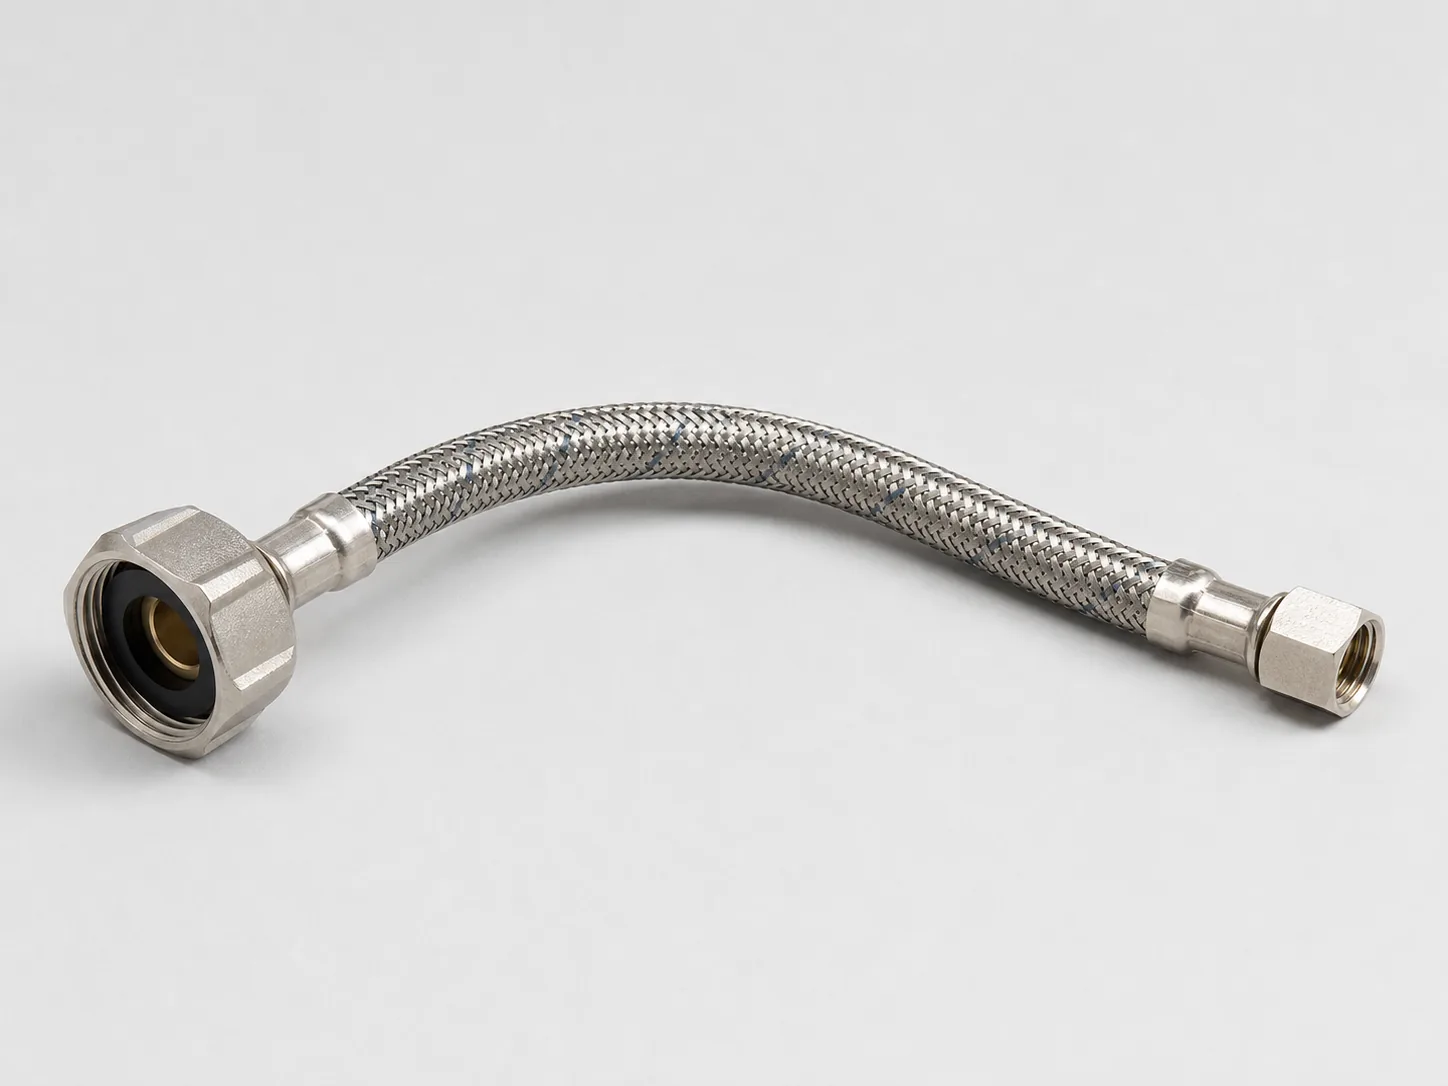
Fix: flush debris from the valve cap if the manufacturer supports that maintenance step, replace the cap and seal if available, or replace the whole fill valve. A new fill valve, or a complete fill-valve-and-flapper kit, is an inexpensive part. Time: 15-45 minutes plus test cycles. Difficulty: easy if the toilet shutoff valve works and the supply nut is accessible; moderate if the supply line is old, corroded, or rigid.
Escalate when: the shutoff valve leaks or won’t close, the supply tube is soldered or rigid copper, water pressure exceeds 80 psi, or the tank uses a pressure-assist vessel.
Buying a new fill valve? Identify the one you have first.
Cause 3: Water Level Set Too High or Float Misadjusted
A misadjusted float looks like a defective fill valve but isn’t – the valve still shuts off correctly, it is just being told to shut off too late. The signature is water spilling into the top of the overflow tube continuously after the tank “refills.” American Standard says the tank water level should sit about a quarter to half inch below the top of the overflow tube; Kohler gives a common target of about one inch below the top.
This often appears right after a new fill-valve installation, after someone bumped the float adjustment, or when an older float mechanism sticks. If pushing the float down by hand stops the running, the diagnosis is confirmed.
Fix: adjust the float lower until the water stops below the overflow tube and near the toilet’s marked waterline. Most modern float-cup fill valves use a thumb screw or clip on the float assembly. Parts cost: $0 unless the adjustment mechanism itself is broken. Time: 2-10 minutes. Difficulty: trivial.
Escalate when: the water level cannot be lowered enough, the float sinks, or the valve keeps running even after adjustment – at that point it’s a fill-valve replacement, not an adjustment.
Cause 4: Chain, Handle, or Lever Trouble
The handle and chain move every flush, so a small change in slack can hold the flapper open or stop it from lifting cleanly. The signature is running that stops when you nudge the handle, a flapper visibly pulled off-center, or running that started after a flapper replacement.
American Standard specifies about 0.25 inch of chain slack; Korky recommends leaving only one to two chain links of slack. Too much slack and the handle doesn’t lift the flapper enough; too little and the chain holds the flapper open or kinks. Kohler’s running-toilet guide flags overly tight chains too.
Fix: reset the chain slack to one or two links, remove tangles, trim excess chain, and confirm the lever arm doesn’t bind against the tank lid or the flush valve. Parts cost: $0 for adjustment, or the low cost of a replacement lever if the handle is broken. Time: 2-15 minutes. Difficulty: trivial.
Escalate when: a universal lever physically interferes with a proprietary flush valve, the tank lid changes the lever travel, or the toilet has a dual-flush button mechanism that requires a model-specific lever.
Cause 5: Refill Tube Siphoning Water Out of the Tank
This one is less common but it is the classic “I replaced everything and it still runs” cause, which makes it disproportionately important to know about. The refill tube is the small flexible hose that runs from the fill valve to the overflow tube during refill – its job is to send a small stream into the bowl so the bowl refills after a flush. If the tube end sits below the tank waterline or gets pushed too far down inside the overflow pipe, water siphons from the tank through the tube into the bowl continuously.
The signature: intermittent refills with a flapper and fill valve that both look fine, a refill tube visibly stuck down inside the overflow pipe, or a tank that drains when you hold the float up.
This is common right after a DIY fill-valve replacement because new fill valves come with a clip that holds the tube at the proper position – and the clip frequently gets thrown away or skipped. Kohler specifies that the refill hose should be aimed into the overflow tube and positioned about a half inch above the tank waterline.
Fix: use the supplied clip (or a generic one from the parts aisle) to hold the refill tube above the waterline, pointing into the overflow tube from above. Parts cost: $0 if the clip exists, or the cost of a fill-valve hardware kit if missing. Time: 2-5 minutes. Difficulty: trivial.
Escalate when: the overflow tube itself is cracked, too short, or part of a damaged flush-valve assembly.
Cause 6: Damaged Flush Valve, Cracked Overflow, Tank Defect, or Pressure-Assist Failure
The sixth bucket is the least common but the most consequential: water is bypassing your flapper diagnosis through a damaged flush-valve seat, cracked overflow tube, leaking flush-valve gasket, leaking tank-to-bowl gasket, a hairline tank crack, or a pressure-assist vessel issue. The diagnostic giveaway is the dye test combined with the supply-off test: if you turn off the toilet supply, mark the water level, wait thirty minutes, and the tank drains BELOW the flapper opening, the leak isn’t the flapper – it’s the flush-valve assembly or the porcelain itself.
This bucket gets more likely as toilets age, as overflow tubes get brittle, after several flapper replacements have failed to fix the running, or with proprietary canister/tower flush valves that require an exact model-specific seal. Kohler’s running-toilet guide treats a canister seal like a flapper: replace the flapper or canister seal.
Pressure-assisted toilets – the ones with a sealed black vessel inside the tank instead of open water (Flushmate, Sloan systems) – need their own troubleshooting path. Sloan’s procedure starts with shutting off the water supply and flushing to relieve pressure before any service work. Pressure-assist tanks carry recall history and a different safety profile than a normal gravity tank.
Fix: if the only problem is a pitted or mineral-crusted flush-valve seat (a new flapper still leaks, but the seat is intact), try the cheap intermediate step first: shut off the supply, sponge the tank dry, and gently smooth the seat rim with a green non-scratch ScotchBrite pad or fine wet/dry sandpaper and a little white vinegar to cut the scale, then reseat a new flapper. That $0 step saves a full tank-off repair in many “new flapper still leaks” cases. If the seat is cracked, deeply pitted, or the overflow is damaged, then for a gravity toilet replace the flush-valve assembly and the tank-to-bowl gasket (a tank-off repair). For a proprietary canister/tower, source the exact model-specific seal. For pressure-assist, follow the manufacturer’s documentation or call a plumber. Parts cost: complete tank repair kits run $20 to $35; pressure-assist cartridges are model-specific and more expensive. Time: 45-120 minutes for a tank-off gravity repair, longer if bolts are corroded. Difficulty: moderate for a standard two-piece toilet; hard or plumber-grade for cracked tanks, seized bolts, failed shutoff valves, or pressure-assist systems.
Escalate when: water is on the floor, porcelain is cracked, the tank drains below the flapper level, a pressure-assist vessel has been recalled, or the supply can’t be reliably shut off.
Replacing the flush valve? Identify its family first: the size and the parts differ between them.
Why Is My Toilet Running? The 5-Minute Diagnostic Walkthrough
Run these steps in order and you’ll usually identify why your toilet is running without buying any parts first.
- Remove the tank lid and watch one full refill cycle. If water rises into the overflow tube and keeps going, jump to causes 2 or 3.
- Lift the float gently while the toilet is running. If the water stops, the valve can shut off – the fix is adjusting the float lower (cause 3). If the water keeps running, the fill valve needs service or replacement (cause 2).
- Look at the refill tube position. If it’s submerged below the waterline or pushed down inside the overflow pipe, clip it above the waterline (cause 5).
- Press gently on the flapper or canister seal. If the running stops, the seal is dirty, misaligned, worn, or the wrong part (cause 1).
- Check chain and handle. Tight, tangled, caught under the flapper, pulling at an off-center angle – adjust before buying parts (cause 4).
- Run a dye test for silent or intermittent symptoms. Food coloring in the tank, twenty minutes of no flushing, then check the bowl for color (confirms cause 1 or 6).
- Shut off the toilet supply, mark the water level, wait thirty minutes. If water drops to the flapper level, it’s a seal (cause 1). If it drops below the flapper, it’s flush-valve or porcelain (cause 6).
If multiple toilets in the house hiss or run, or if fill valves keep failing early, test static water pressure at a hose bib with a gauge. A reading above 80 psi means the diagnosis is a pressure-reducing valve, not a flapper.
The Symptom-to-Cause Shortcut
| What you hear or see | Most likely cause | Fix cost |
|---|---|---|
| Constant running, water spilling into overflow tube | Cause 2 or 3 (fill valve or float) | $0-$22 |
| Runs for 30 seconds every few minutes, nobody flushed | Cause 1 (flapper) | $3-$10 |
| Jiggling the handle stops it | Cause 4 (chain or lever) | $0 |
| Runs only after recent DIY tank work | Cause 4 or 5 (chain or refill tube) | $0 |
| Tank water drops below the flapper with supply off | Cause 6 (flush valve or porcelain) | $20-$35+ |
| Runs or ghost-flushes only at night / early morning | Marginal flapper or fill valve pushed over the edge by overnight pressure rise | $3-$10 + pressure check |
| Several toilets hissing house-wide | Whole-house pressure problem | Plumber |
| Sealed black vessel inside tank | Pressure-assist (Flushmate/Sloan) | Manufacturer support or plumber |
When to Stop and Call a Plumber
DIY is the right call for most gravity-tank running-toilet repairs. Stop and call someone when:
- Water shows up outside the toilet. Floor water means tank bolts, the tank-to-bowl gasket, the supply valve, the supply line, a tank crack, or a wax-ring/base leak – not just a running toilet. HomeAdvisor prices leaky toilet repair at $100-$600 and running toilet repair at $100-$400.
- The shutoff valve leaks, won’t close, or is visibly corroded. Green oxidation on a brass valve means water has been escaping for a while. Old shutoff valves can start leaking the moment you finally try to close one after years of disuse.
- The repair needs soldering or torch work. Cutting a copper stub-out or replacing a soldered shutoff valve is not the same job as a flapper replacement and shouldn’t be bundled in.
- Static water pressure exceeds 80 psi. Code requires a pressure-reducing valve at that point. This is a whole-house plumber job, not a toilet job.
- The tank contains a pressure-assist vessel. Different safety profile, manufacturer-specific service path.
- The same toilet keeps running after the correct flapper and fill valve were installed. At that point, the diagnosis is wrong – you’re looking at flush-valve damage, tank crack, or a refill-tube siphon, and a plumber can confirm fastest.
The national average toilet repair cost runs $271 (HomeAdvisor), with a normal range of $150-$391. Plumber labor commonly runs $45-$200 per hour, and labor can account for 60-75% of the repair price, which is why a simple $5 flapper that takes ten minutes is the most economically attractive DIY work in the house.
What to Do Next
Whether you came to this article asking why is my toilet running and confirmed the flapper, or worked through the diagnostic and landed on the fill valve, the repair guide for each cause is listed in our Toilet Repair Guide (Pillar 2 hub).
For the broader diagnostic approach across plumbing fixtures, our faucet-side coverage uses the same symptom-first structure – start with Faucet Repair: A Homeowner’s Complete Guide or Why Is My Faucet Leaking for the cross-fixture diagnostic patterns that work for any leak you can’t quite locate.
What is the most common cause of a running toilet?
The flapper, or flush-valve seal, by a wide margin – Fluidmaster calls it the leading cause. It’s the tank’s drain plug, so any wear, mineral buildup, wrong size, or chain interference leaves a leak path from tank to bowl and the fill valve keeps topping the tank back up.
How do I confirm it’s the flapper?
Run the dye test: drop food coloring in the tank, wait fifteen to twenty minutes without flushing, and check the bowl. Color in the bowl means the seal is leaking.
What is “ghost flushing” or phantom flushing?
It’s when the toilet is quiet most of the time but the fill valve kicks on for a few seconds every few minutes or hours, with nobody touching the handle. That pattern points at a slow tank-to-bowl leak – usually the flapper (cause 1) or a flush-valve/porcelain problem (cause 6).
I replaced the flapper and fill valve and it still runs – why?
The classic culprit is the refill tube siphoning water into the overflow tube (the positioning clip often gets thrown away), or a damaged flush valve / cracked porcelain. Confirm with the supply-off test: shut off the toilet supply, mark the water level, wait thirty minutes – if it drops below the flapper opening, the leak is the flush-valve assembly, not the flapper.
Why does my toilet run only at night?
Municipal water pressure usually rises overnight and early in the morning, when few homes in the neighborhood are drawing water. That higher static pressure can push a flapper or fill valve that is already marginal just past the point of sealing, so the toilet ghost-flushes or runs at night and goes quiet by midday. Fix the worn part first; if it recurs across fixtures, test static pressure at a hose bib and add a pressure-reducing valve if it reads over 80 psi.
How much does it cost to fix a running toilet?
Five of the six causes are a $5 to $25 part and about an hour of your time – a standard 2-inch flapper runs roughly $3 to $7 and a fill valve around $10, with combo kits about $17 to $22. If you hire it out, the national average toilet repair is about $271 (HomeAdvisor), which is why the DIY flapper fix is so economically attractive.
When should I stop and call a plumber?
When water shows up on the floor, the porcelain is cracked, the tank drains below the flapper with the supply off, the shutoff valve leaks or won’t close, static water pressure exceeds 80 psi (code then requires a pressure-reducing valve), or the tank uses a pressure-assist vessel.
Sources
- Fluidmaster: Toilet Running Constantly
- Fluidmaster: Identify and Fix Toilet Flapper Leaks
- Fluidmaster: How to Install a Flapper
- Korky: Running Toilet Help
- Kohler: How to Fix a Running Toilet
- Kohler Assist: Toilet Constantly Leaking or Running
- Kohler Assist: Tank Leak Fill Valve Hose Position
- Kohler Assist: Minimum and Maximum PSI for Plumbing Fixtures
- American Standard: Toilet Running FAQ
- Home Depot: How to Fix a Running Toilet
- Home Depot: How to Replace a Fill Valve
- This Old House: Fixing Running Toilets
- HomeAdvisor: Toilet Repair Cost Guide
- Angi: Running Toilet Repair Cost
- EPA WaterSense: Fix a Leak Week
- Kully Supply: Sloan Flushmate Troubleshooting Guide
- ICC International Plumbing Code 604.8
Educational content only. Not a substitute for licensed professional advice. Local plumbing codes vary by jurisdiction. Use of any guidance from this guide is at your own risk.
Parts for this repair
As an Amazon Associate, plumbingbythebook earns from qualifying purchases. Links below are affiliate links — they cost you nothing extra.
- Korky 2-Inch Universal Toilet Flapper — The most common fix — a worn or warped flapper is the #1 cause of a running toilet. Match your flush-valve size (most older toilets are 2 inch).
- Fluidmaster 400A Anti-Siphon Toilet Fill Valve — Universal, height-adjustable fill valve — the fix when the valve won’t shut off or water keeps rising into the overflow tube.
- Fluidmaster Complete Toilet Repair Kit (Fill Valve + Flapper) — Replaces both wear parts at once — the cost-effective move on a 5+ year-old toilet when you are already in the tank.
- Toilet Tank-to-Bowl Gasket and Bolt Kit — For the less-common cause 6 — a leaking flush-valve or tank-to-bowl gasket — a tank-off repair that also stops a leak at the tank base.
Related guides
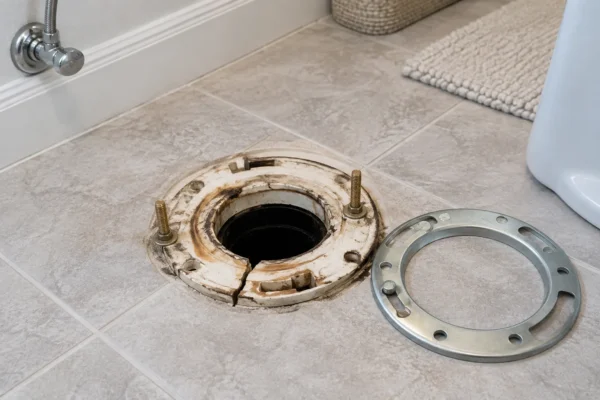
Cost to Repair a Toilet Flange: DIY vs. Plumber [2026]
The cost to repair a toilet flange runs about $145 to $350 with a plumber, according to Angi,…
How to Identify Your Toilet Flush Valve [2026]
Pull off the tank lid to fix a running toilet and you’ll find one of two very different…
How to Identify Your Toilet Flapper by Brand [2026]
Pop the tank lid to replace a leaking flapper and you’re staring down a hardware-store aisle of red…