
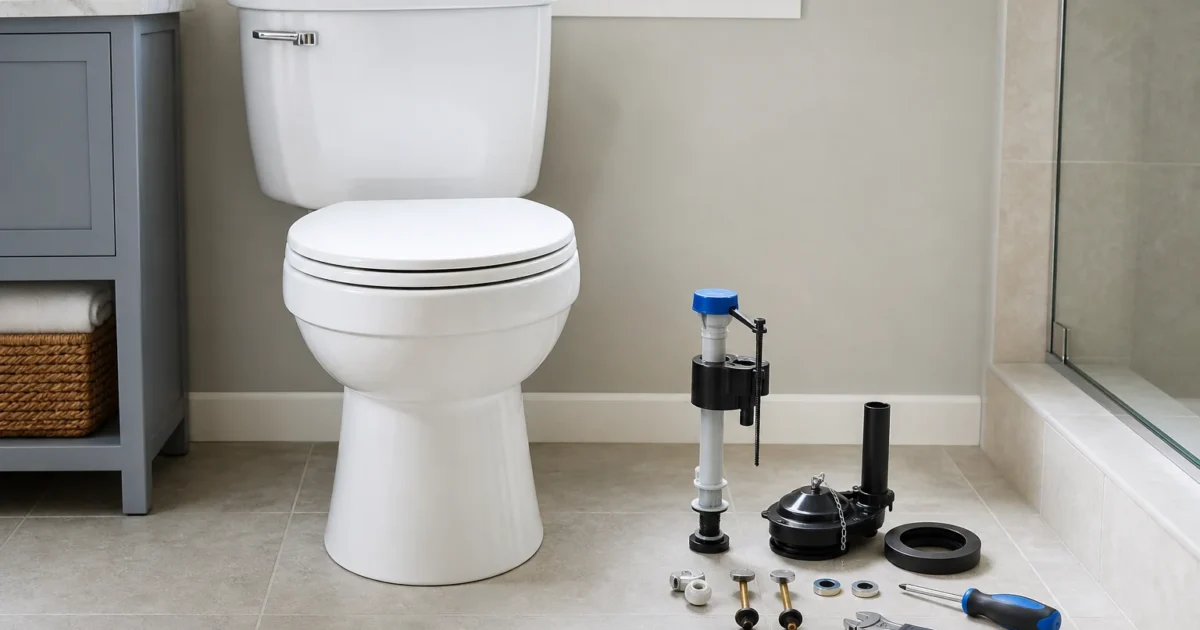
If your toilet just needs a $10 flapper, replacing the whole thing is a waste of money. But if you’re on your third repair this year, or the bowl itself is cracked, the math flips fast. Knowing when to replace the whole toilet instead of patching it again comes down to four things: what’s actually broken, how old the fixture is, how much water it wastes every day, and whether the next repair is likely to be the last one. This guide walks through the honest cost comparison – repair, tank rebuild, or full replacement – so you’re not guessing. For step-by-step fixes on any specific part, our Toilet Repair guide covers the whole tank and bowl.
When to Replace the Whole Toilet: The Quick Answer
The short version: repair a sound, modern toilet with an isolated problem; replace a toilet that’s cracked, chronically failing, or old enough that it’s wasting real money on water. Angi lists cracked porcelain, constant clogging, repeated small repairs, age, and water inefficiency as the core replacement triggers, and HomeAdvisor adds a clean rule of thumb: once repair costs pass roughly 50% of what a new toilet would cost installed, replace it instead.
Here’s how the three realistic paths compare, using national planning ranges rather than a firm local quote:
| Option | What it covers | DIY cost | Pro cost | Source |
|---|---|---|---|---|
| Targeted repair (flapper, fill valve, handle) | One failed part | Under $30 in parts | ~$271 average (Angi, range $150-$391) | Angi |
| Tank rebuild (fill valve + flapper kit) | Multiple tank wear parts at once | ~$23 (Home Depot, Lowe’s) | Budget like a repair visit unless quoted otherwise | Home Depot / Lowe’s |
| Whole-toilet replacement, same location | New fixture, new seal, disposal | ~$99 fixture (budget WaterSense models) | ~$423-$832 all-in (Angi, HomeAdvisor) | Angi / HomeAdvisor |
Budget toilets can start around that $99 mark (Home Depot Glacier Bay, Lowe’s Project Source), but branded or commercial-duty models commonly run $230 to $575 before labor (American Standard Cadet, Kohler Kingston) – so don’t anchor your budget on the cheapest fixture alone. For a deeper breakdown of the installed number itself, see our cost to replace a toilet guide.
What Actually Drives the Decision
Not every factor carries equal weight when you’re deciding when to replace the whole toilet instead of fixing what’s in front of you. Cracked porcelain sits at the top: a crack in the bowl or tank isn’t something you repair in the normal sense, and Angi treats it as a straightforward replacement trigger, especially when the crack risks a slow leak or a flood. That’s different from water pooling at the base, which is usually just a failed wax seal – Lowe’s, Kohler, and Oatey all describe reseating the toilet on a new ring as routine repair work, not a replacement-grade problem.
Right behind cracks: a pattern of recurring repairs. One failed flapper is a repair. Three tank-part failures in two years, or a toilet that clogs constantly, is a fixture telling you it’s done – Angi lists chronic clogging and repeated small repairs alongside age and cracked porcelain as replacement signals, and HomeAdvisor’s 50% rule gives you the number to check it against.
Age and water use matter almost as much, and they’re measurable. The EPA puts pre-1980 toilets at roughly 5.0 gallons per flush (gpf), 1980-1994 toilets at about 3.5 gpf, post-1994 toilets at 1.6 gpf, and current WaterSense-labeled models at 1.28 gpf or less. A WaterSense label is worth more than a “1.28 gpf” claim on its own – it means the fixture passed independent third-party testing for both efficiency and flush performance, not just a volume spec (EPA). The older and more heavily used your toilet is, the more that gap is quietly costing you.
Two secondary factors round it out. Hard water and mineral buildup can shorten the life of tank parts (Angi), and in-tank bleach or chlorine tablets can damage flappers and fill valves outright – both Fluidmaster and Gerber warn against them, and some warranties exclude damage from tank cleaners entirely. If you’re replacing parts every six months, check what’s in the tank before you blame the toilet. Selling soon or living in a regulated market also tips the scale – California requires sellers to disclose noncompliant plumbing fixtures and now limits residential toilets to 1.28 gpf under its 2025 Green Building Standards Code (Cal. Civil Code §1101.4, 2025 CALGreen).
Repair vs. Replace – the Honest Math
Over a 5-10 year horizon, the cheapest option upfront isn’t always the cheapest option overall. A simple DIY flapper or fill-valve swap costs under $30 in parts. Two professional repair visits over 10 years, at Angi’s $271 average, run about $542 – and that number doesn’t capture any water savings, because it’s fixing what’s broken, not upgrading the fixture (Angi).
A tank rebuild – a combined fill-valve-and-flapper kit – sits around $23 in parts (Home Depot, Lowe’s) and makes sense when the porcelain is sound but multiple wear parts are failing at once. It’s the middle path: cheaper than replacement, more thorough than a single-part repair. Marketing labels these kits “universal,” but treat that loosely – Fluidmaster’s own product pages exclude flapperless toilets and some one-piece models, and flapper size (2-inch versus 3-inch) varies by toilet age, so check your tank model and flush-valve size before you buy (Fluidmaster).
Full replacement runs a realistic $423-$832 all-in once you add a $99-plus fixture to Angi/HomeAdvisor’s $224-$533 installation range and a $50-$200 removal fee (Angi, HomeAdvisor). What changes the math is water.
For a typical three-person household, swapping a 1.6-gpf toilet for a 1.28-gpf WaterSense model saves about 1,769 gallons and $10.72 a year; swapping a 3.5-gpf toilet saves roughly 12,285 gallons and $74.43 a year; and swapping a 5.0-gpf toilet saves about 20,579 gallons and $124.73 a year, per EPA calculator assumptions. Over 10 years, that’s roughly $107, $744, and $1,247 respectively – enough that replacing a genuinely old toilet can pay for a meaningful chunk of itself in water savings alone. If you want to see what your specific toilet is costing you right now, our Water-Waste Calculator turns your flush volume and household size into a dollar figure.
The Hidden Costs Each Option Introduces
Repair costs more than the sticker price once the job crosses into wax-ring territory: Lowe’s and Oatey both note that a failed seal can point to a rocking toilet or a damaged flange, and standing water under a toilet can weaken the subfloor over time.
Replacement carries its own hidden costs. HomeAdvisor lists hidden leaks, floor repair, drywall repair, and drain adjustments as possible add-ons, and Angi prices flooring repair separately at $8-$24 per square foot when subfloor damage turns up. Fit matters too – Lowe’s notes that 12-inch rough-in is standard but 10- and 14-inch rough-ins show up in older homes, so measure before you buy. And a toilet weighs 100-120 pounds (Angi), which is a real factor for DIY handling and disposal.
Edge Cases That Flip the Decision
A few situations override the standard cost math entirely.
Rental or high-use property. Durability and fewer repeat service calls matter more than the lowest part price when you’re not the one dealing with the next failure – commercial-duty fixtures built for serviceability are worth the premium in these settings.
Historic or period bathroom. If the porcelain is sound and the fixture’s look matters to you, a tank rebuild that preserves the original bowl and tank can beat replacement – This Old House documents exactly this call on an old water-guzzling toilet whose internals were rebuilt rather than the whole fixture swapped out. Just know that preserving the exterior doesn’t make it WaterSense-certified.
Pending sale or a regulated jurisdiction. California requires disclosure of noncompliant plumbing fixtures at sale and now mandates 1.28-gpf WaterSense performance for residential toilets under its updated green building code (Cal. Civil Code §1101.4, 2025 CALGreen). If you’re selling in a market like that, replacement can be the right call even when a repair would work mechanically.
Multi-unit or upstairs bathrooms. A bad wax-ring reset or a botched replacement on a shared-risk building means leaking into the unit below, not just your own floor. This doesn’t force replacement, but it’s a strong argument for a professional reset rather than a rushed DIY job.
Specialty toilets. Pressure-assisted, flapperless, dual-flush, canister/tower, and wall-hung toilets can flip the decision because generic repair kits often don’t fit. Flushmate requires system-specific parts for its pressure-assist units, and Lowe’s notes wall-hung toilets need in-wall bracing and waste-system changes – not a same-location swap. If you have an older pressure-assist toilet, check for open recalls before you spend on repair parts: Flushmate has recalled certain Flushmate III 503 units made between October 1997 and April 2011 over a burst-vessel hazard (Flushmate recall).
Should You DIY It or Hire a Pro?
DIY is strongest for simple tank parts. Flappers, fill valves, and handles are inexpensive, live inside the tank, and don’t require lifting the fixture – the EPA notes a silent tank leak is often just a worn rubber flapper away from fixed (EPA). The risk profile changes the moment the toilet has to come off the floor: wax-ring work means draining, disconnecting, lifting a 100-120 pound fixture, inspecting the flange, and setting it accurately without cracking the porcelain – Kohler specifically warns against overtightening the closet bolts for this reason.
Manufacturers don’t agree on every detail of the reset itself – wax placement and seating technique vary by brand – so follow your specific toilet and seal manufacturer’s instructions rather than a one-size-fits-all method.
For replacement, This Old House rates a straightforward swap as an easy DIY project, with estimates ranging from about 1-2 hours for someone with midlevel plumbing skill up to 4-6 hours for a first-timer. That holds up as long as the flange, shut-off valve, and subfloor are in good shape. The moment any of those three are questionable, hiring a pro (Angi/HomeAdvisor’s $224-$533 range) is the lower-risk default – a licensed installer catches flange and subfloor problems before they become a leak inside a wall.
When to Call a Pro
These are the conditions that answer when to replace the whole toilet by calling in a plumber instead of tackling it yourself:
- The bowl or tank is visibly cracked, or you suspect a hairline crack from a slow, unexplained leak.
- You’ve had three or more repairs on the same toilet within the past year or two.
- The subfloor feels soft, springy, or shows staining – a sign water has already gotten underneath.
- The closet flange is cracked, corroded, or sits noticeably below the finished floor.
- The shut-off valve is stuck or won’t fully close, which turns a simple job into a supply-line repair.
- You’re moving the toilet’s location, changing to a wall-hung model, or need to correct existing rough-in plumbing – this is remodel work, not a repair-vs-replace decision.
- You have a pressure-assisted, flapperless, or specialty toilet and can’t confirm the right replacement part fits.
How to Choose and Vet a Plumber
If your situation crosses into pro territory, a little vetting protects both the price and the outcome. Describe exactly what you’re seeing – “the tank refills constantly and I’ve replaced the flapper twice” – so the quote reflects the real job rather than a generic estimate. Ask whether the quote includes flange or subfloor repair if needed, since those are the line items that turn a $271 repair into a $600 one. Confirm the plumber is licensed and insured, get the estimate in writing, and get two or three quotes on anything beyond a simple part swap – a wide spread between bids usually means they’re assuming different scopes of work, so ask each one what’s included.
How do I know when to replace the whole toilet instead of repairing it?
Repair is worth it if the porcelain is intact, the problem is one part (flapper, fill valve, handle), and you haven’t had repeated failures. Once repair costs approach 50% of a new toilet’s installed price, or the bowl is cracked, replacement is the better math (HomeAdvisor, Angi).
Is a cracked toilet bowl always a replace, never a repair?
Practically, yes. Angi treats bowl or tank cracks as a replacement trigger, particularly when there’s any risk of a slow leak turning into a flood – there’s no reliable, code-compliant repair for a cracked vitreous china bowl.
How old does a toilet have to be before replacing it saves money?
Anything installed before 1994 is worth a look. Pre-1980 toilets use about 5.0 gallons per flush and 1980-1994 models about 3.5 gpf, versus 1.28 gpf for a current WaterSense model – for a typical household, that gap can be worth $75-$125 a year in water costs alone (EPA).
Can I just rebuild the tank instead of replacing the whole toilet?
Yes, if the porcelain is sound and multiple tank parts are failing together. A combined fill-valve-and-flapper kit runs about $23 and is common for many standard gravity toilets – though it’s worth checking your flush-valve size and tank model first, since not every kit fits every toilet (Home Depot).
Do “universal” toilet repair kits really fit any toilet?
Not quite – treat “universal” as “fits many common gravity toilets,” not every toilet. Fluidmaster’s own product pages exclude flapperless toilets and some one-piece models, and flapper size (2-inch vs. 3-inch) varies by toilet age and model, so check your tank model and flush-valve size before buying (Fluidmaster).
Is it cheaper to repair or replace a running toilet?
Almost always cheaper to repair first. A flapper or fill valve swap costs under $30 in parts and fixes the vast majority of running-toilet cases – see why your toilet is running to pin down the cause. Replace only if the running toilet keeps recurring after a proper repair, or if you’re also dealing with cracked porcelain or a genuinely old, water-wasting fixture.
Sources
- Angi – How Much Should Toilet Repairs Cost?
- Angi – How Much Does Toilet Installation Cost?
- Angi – 6 Reasons to Replace Your Toilet
- HomeAdvisor – Cost to Install a Toilet
- EPA WaterSense – How the WaterSense Calculator Works
- EPA WaterSense – Residential Toilets
- EPA WaterSense – Home Maintenance
- Lowe’s – How to Replace a Toilet Wax Ring
- Lowe’s – Toilet Buying Guide
- Kohler – How to Install a Toilet
- Fluidmaster – Universal 3” Toilet Flapper
- Flushmate – Replacement Systems
- Flushmate – Recall Notice
- This Old House – How to Know Whether to Repair or Replace
- California Civil Code §1101.4
Educational content only. Not a substitute for licensed professional advice. Local plumbing codes vary by jurisdiction. Use of any guidance from this guide is at your own risk.
Get the homeowner’s plumbing repair toolkit checklist – the tools, parts, and decisions every homeowner should have on hand. [Free download – enter your email]
Parts for this repair
As an Amazon Associate, plumbingbythebook earns from qualifying purchases. Links below are affiliate links — they cost you nothing extra.
- Fluidmaster 400A Fill Valve + 2-Inch Flapper Repair Kit — The tank-rebuild option — replaces the fill valve and flapper together for most standard gravity toilets, well under the cost of a new fixture.
Related guides
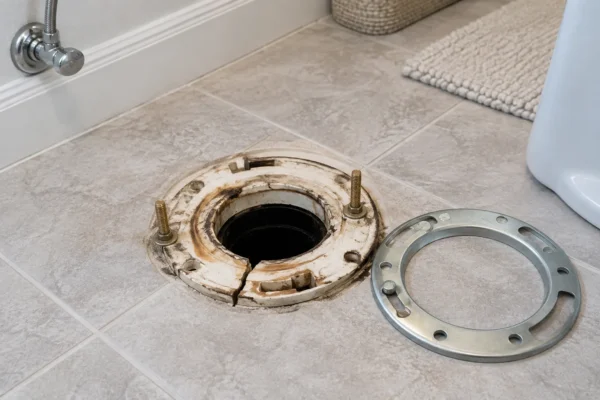
Cost to Repair a Toilet Flange: DIY vs. Plumber [2026]
The cost to repair a toilet flange runs about $145 to $350 with a plumber, according to Angi,…
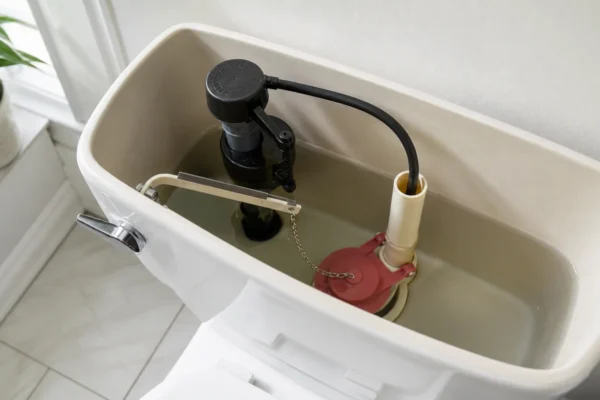
How to Identify Your Toilet Flush Valve [2026]
Pull off the tank lid to fix a running toilet and you’ll find one of two very different…
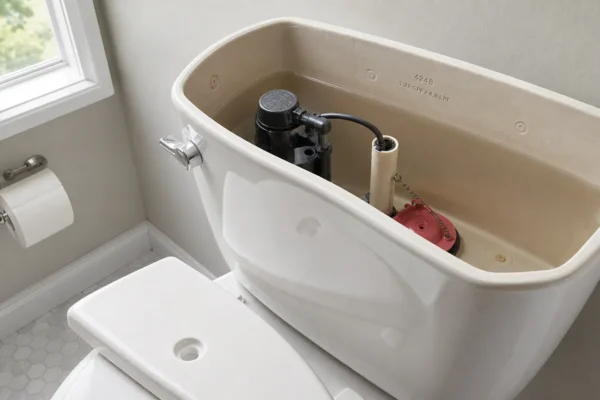
How to Identify Your Toilet Flapper by Brand [2026]
Pop the tank lid to replace a leaking flapper and you’re staring down a hardware-store aisle of red…